This post may contain affiliate links. Please read our Disclosure Policy.
Watch the spinner in action in my video...
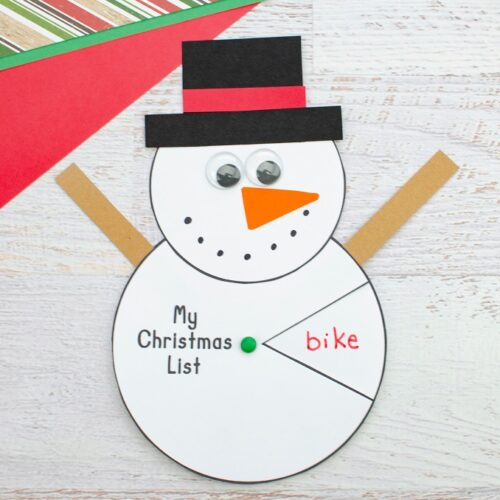
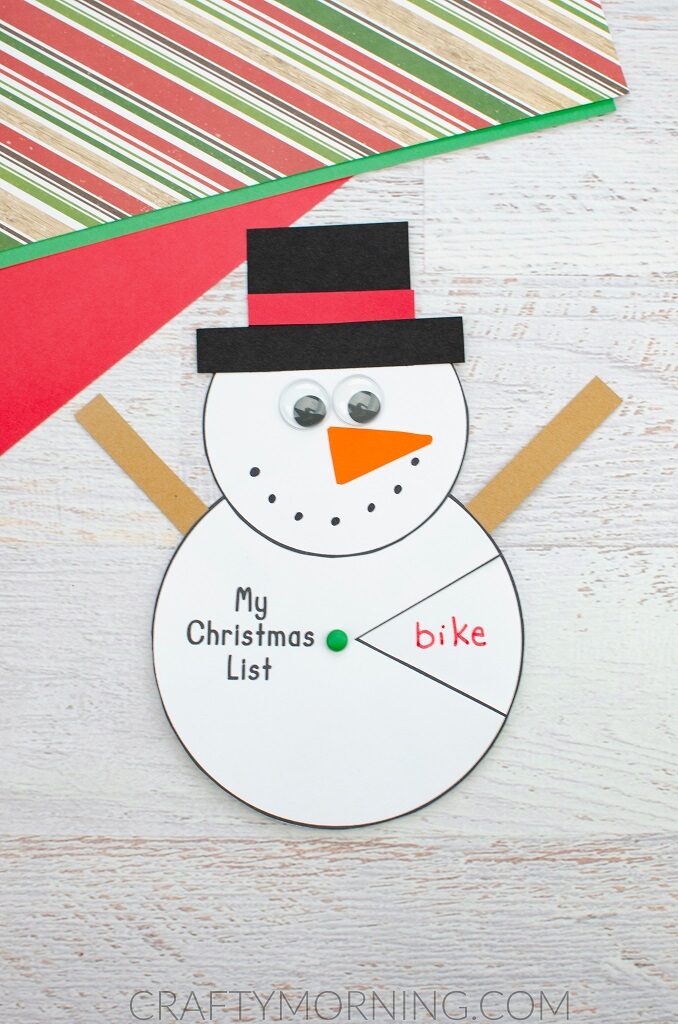
Snowman Christmas Wish Spinner
Ingredients
- Printable Template printed on white cardstock
- Cardstock in Black Brown, Orange and Red
- Scissors
- Red Green and Black markers
- Glue stick
- Google eyes
- 1 green brass fastener
Instructions
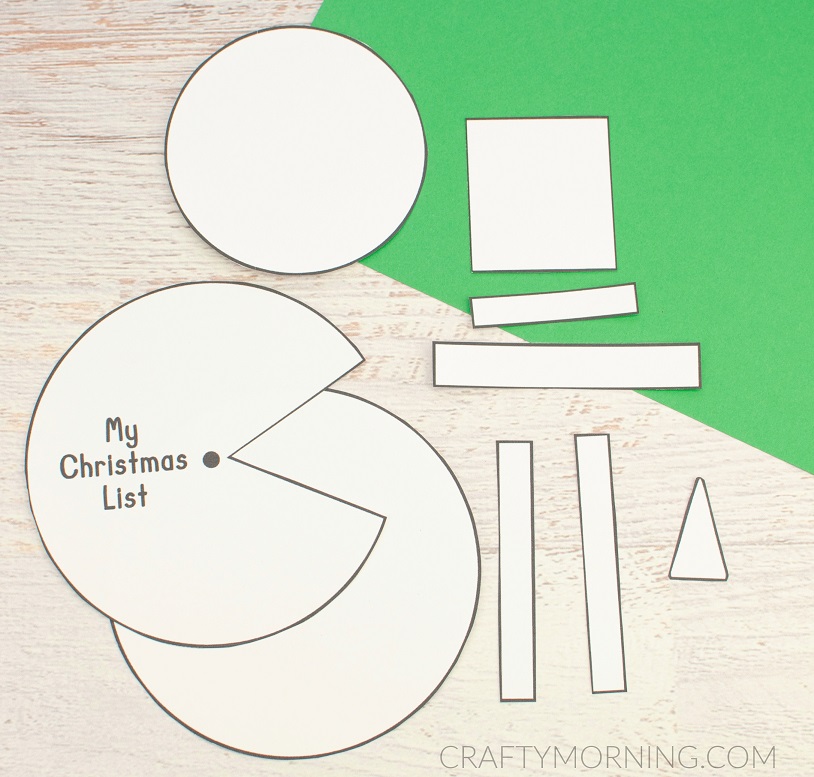
- First print the template on white cardstock.
- Cut out all the pieces.
- Trace the two skinny long rectangle template pieces on brown cardstock. Trace around the triangle template on orange cardstock. Trace around the smallest skinny long rectangle on red cardstock. Finally trace around the other rectangle and square on black cardstock. Cut out all the pieces. TIP: Instead of tracing and cutting these from cardstock, the kids can color the pieces as well.
- Next assemble the snowman’s hat by gluing the long black rectangle to the bottom of the black square. Add the red rectangle belt to finish it.
- Then, glue the whole hat to the smaller circle which will be the snowman’s head.
- Pop on some google eyes and stick on the orange carrot nose.
- Finish the snowman’s head by drawing on a smile consisting of dots.
- Now take the circle that says, “My Christmas List” and glue the brown rectangle arms to the back.
- Then, stack the solid circle behind the ‘List’ circle and poke the brass fastener through both papers at the center dot and bend the ends on the backside. Now the back circle can spin around.
- Glue the head to the front of the body.
- Now use the empty space that spins to write in the Christmas List items.
Make sure to follow Crafty Morning on Facebook, Pinterest, and Instagram or subscribe to our Weekly Newsletter! :)