DIY Scratch Art Using Paper Plates
Make Scratch Art Using Oil Pastels
If your kids are looking for some fun at home activities, try making some scratch art! It’s fun and easy to do.
This post may contain affiliate links. Please read our Disclosure Policy.
Oil pastels are fun to work with and you can create any design!
Watch me do the Same Day/Wet Version:
Scratch Art
Materials
- Paper plates
- Oil Pastels
- Tempera Paint black or another darker color for best results
- Toothpick or scratching tools
- Paper towels or wet wipes for cleaning up messes
Instructions
Dry Version:
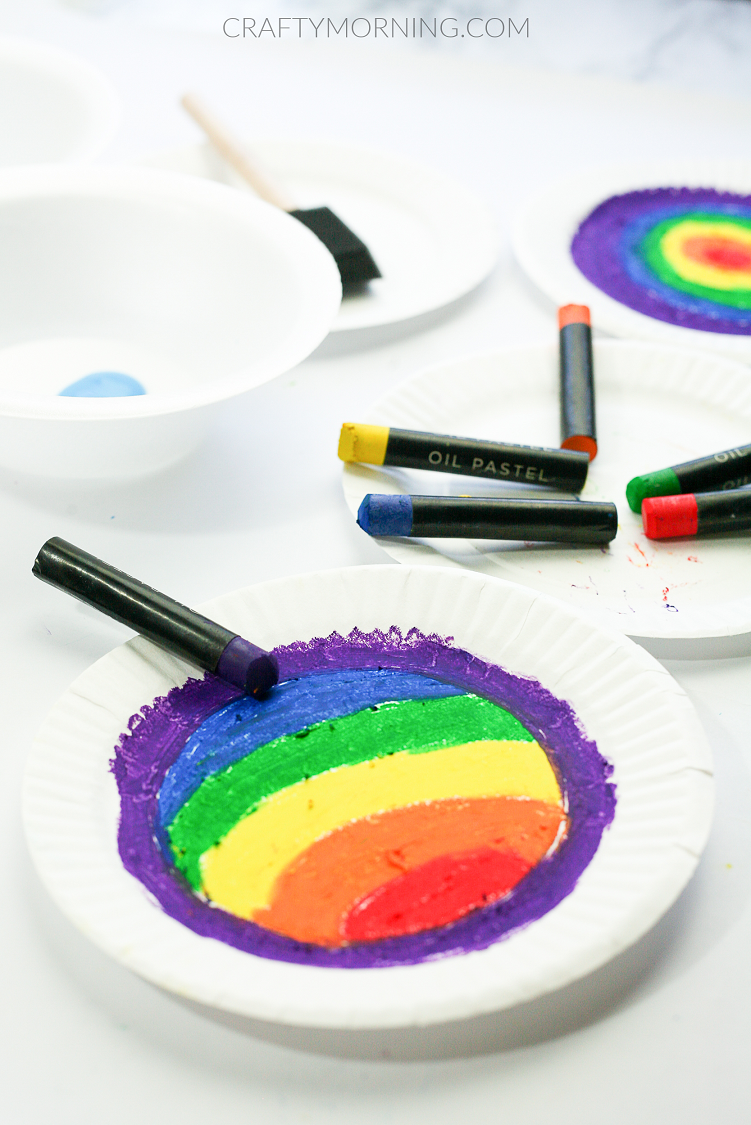
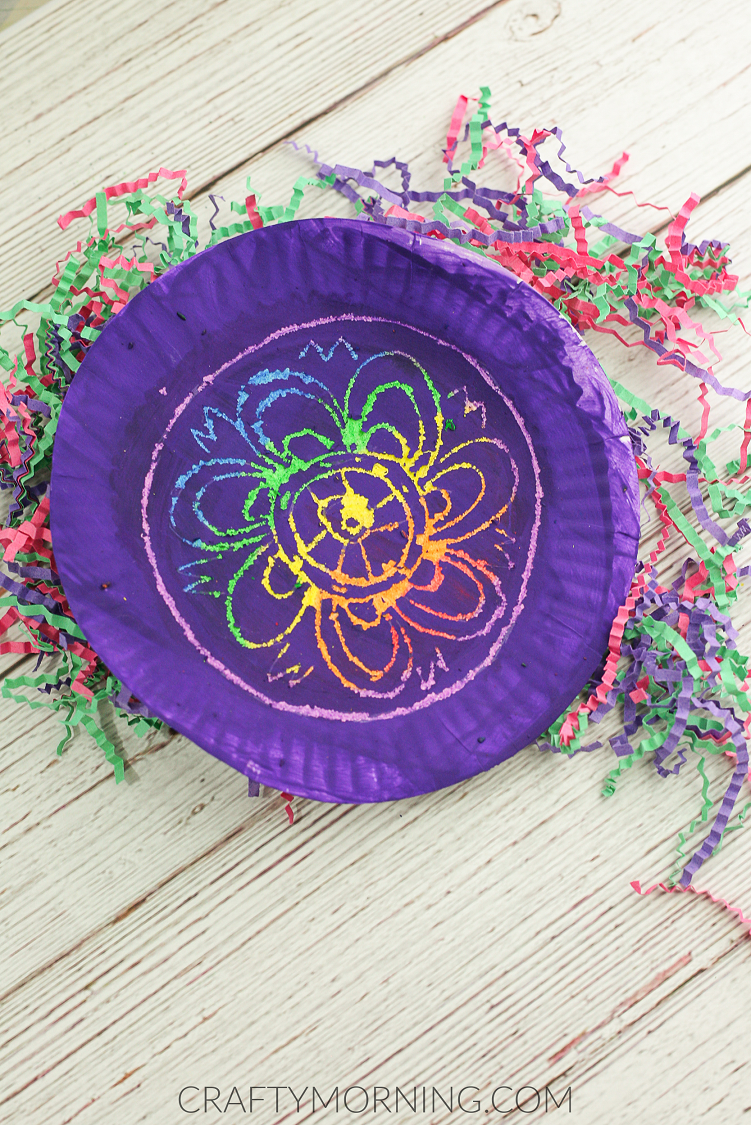
- First draw a colorful pattern on the plate. I used a rainbow type bullseye circle. Other patterns work just as well.
- Make sure to apply the oil pastel pretty thick and blend it so no white is showing through. Shake off excess dust.
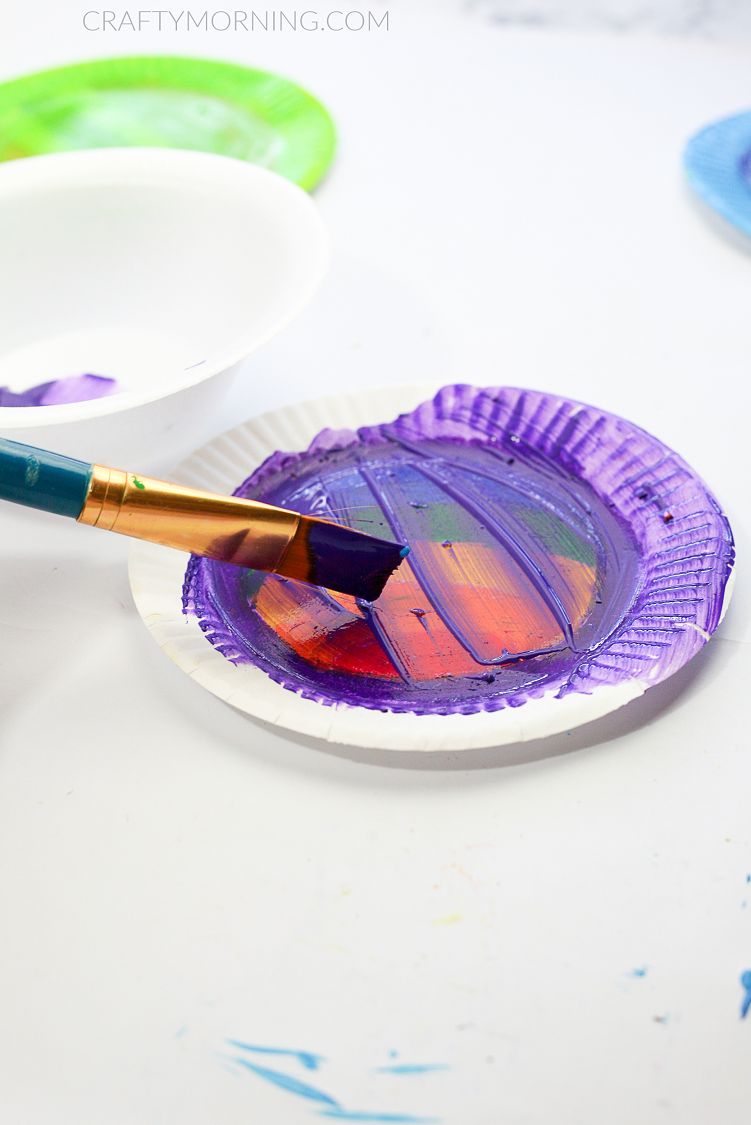
- The first layer of paint should be thin, but cover the plate completely. Let dry before applying second coat.
- Apply a thicker coat of paint for the second layer. Allow to dry. For best results, allow to dry overnight.
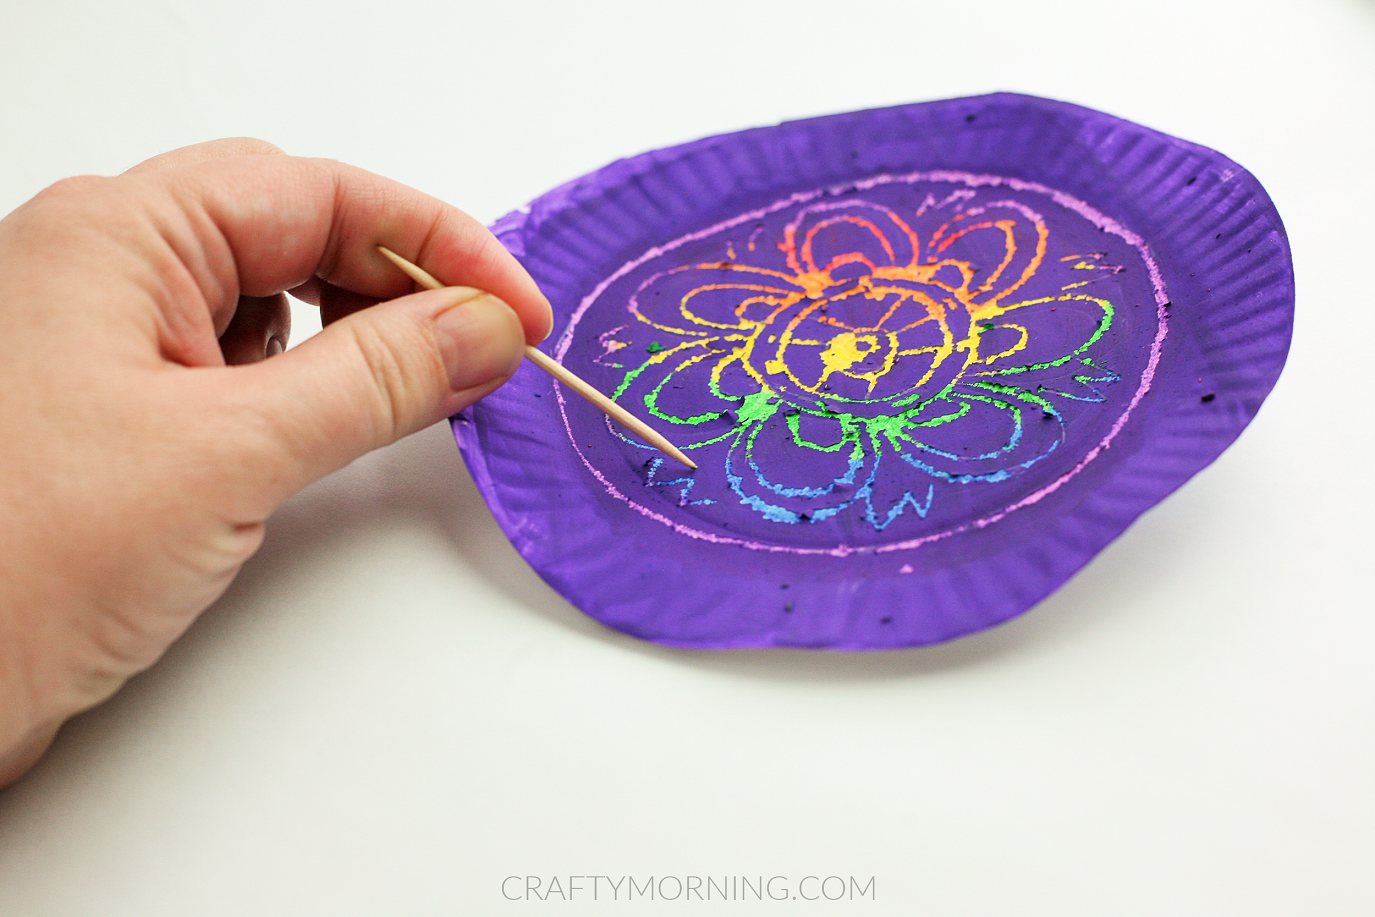
- Take a toothpick, paperclip, or other sketching tool and draw a pattern or picture and watch the magic happen.
Wet/ Same Day Project:
- Color your plate with oil pastels in spirals or straight lines that are thick. Tap off excess dust.
- Apply a thin layer of paint and let dry for an hour. Apply the second coat and let dry for an hour.
- Apply third coat and while it's still wet, take a toothpick and draw designs in it!
- Let dry and hang up!