Shaker Style Cabinet Door Makeover
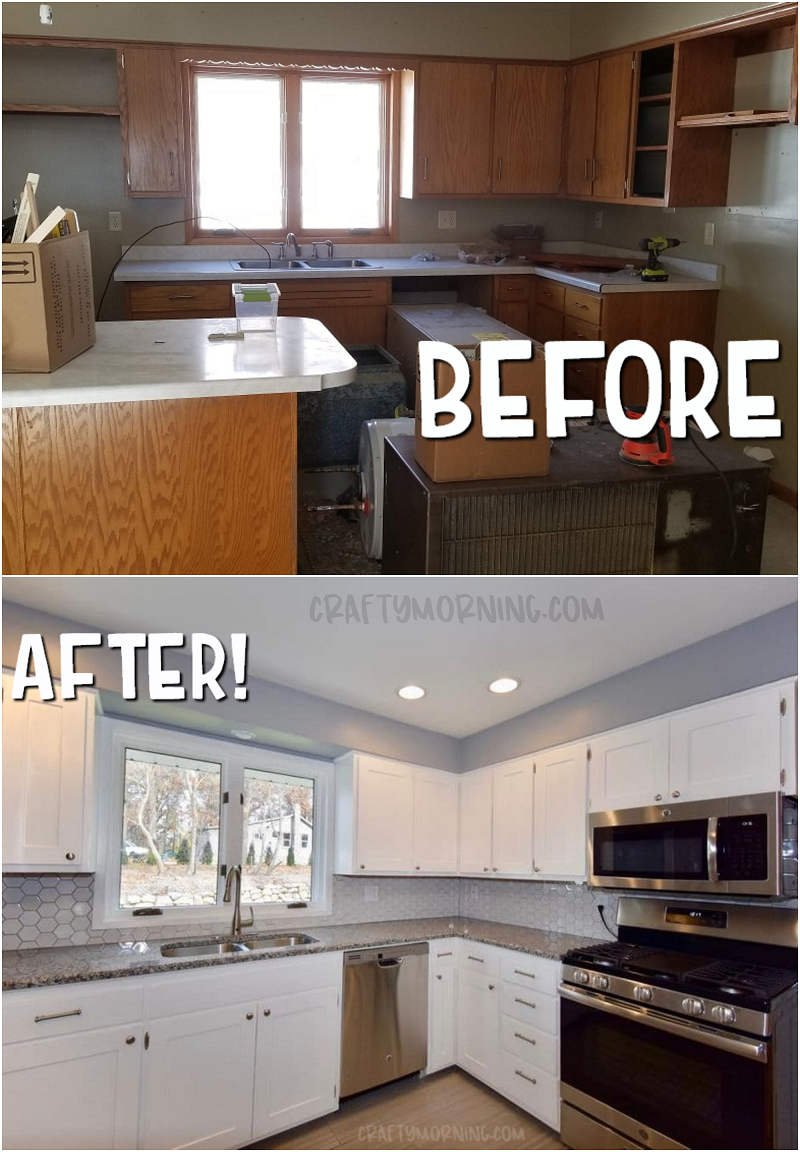

My husband and I went on our first venture together…flipping a 1950’s house. And not only did we have to makeover the entire inside but the whole house was actually moved from another location! Talk about a huge project for newbies. I mean, I should say that about myself because my husband is a pretty handy guy. Anyways, we decided that these ugly cabinet doors would just not be a selling point. Today the shaker style cabinets (edges around the outside) and white color are in style.
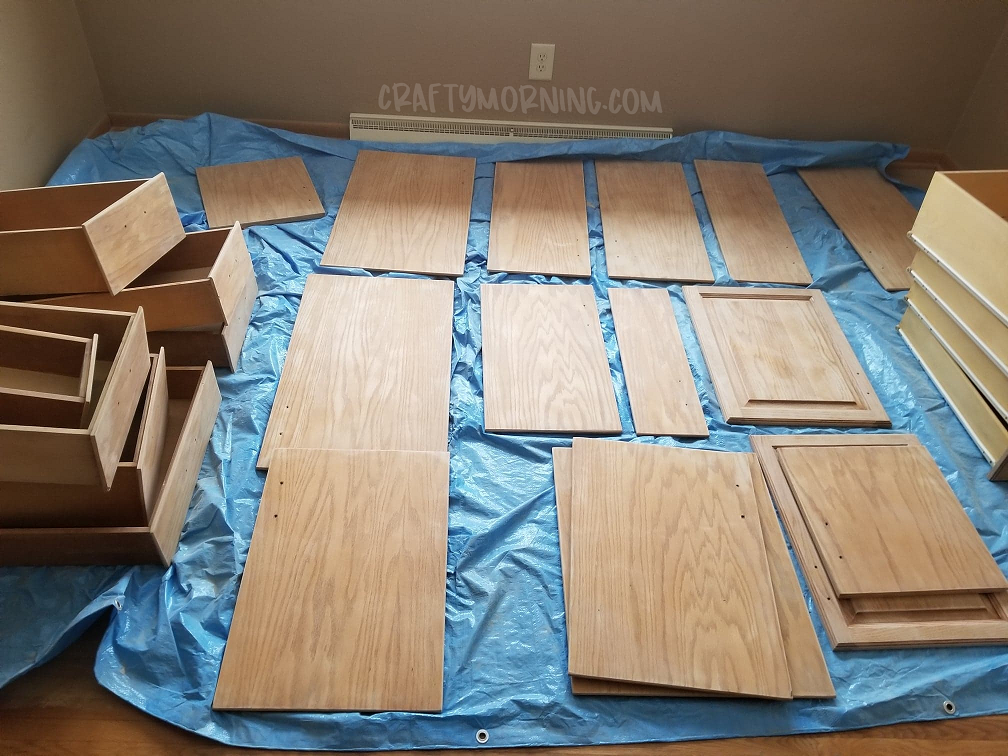
So day one we bought two powered hand sanders (this is MUST for a time saver!) We first removed all the doors off in the kitchen and unscrewed the handles. Make sure to get labeled ziploc bags to put all hardware in if you are saving it. They had nasty brass colored ones so we kept only a few to get the right size ones in brushed nickel. My husband and I sanded down all the sides of the cabinet doors. Holy mess! You must get face masks and goggles to protect yourself from all the sawdust. The previous owners smoked in their house so the smell was also unpleasant. After all of those were sanded, we needed to do a deep clean of the entire room with a vacuum. We used the hose attachment with a brush to get all the dust off the actual doors. Then we used lysol wipes to get the rest off. This prep is SO important to get a smooth surface and to make sure the paint sticks.

We had home depot cut the MDF board to the right size pieces at 4 inch pieces (although, I guess they are not supposed to do that anymore so don’t ask ;). Then my husband measured the side of the cabinet doors and cut it to the right size.

He put wood glue on the back of the boards then nailed them down with the air compressor. The MDF board will need some sanding to get perfect on the edges.

Using a wood filler, put it on all the gaps and nail holes. Then scrape it flat with a putty knife. To make it look better and easier to paint, we put lines of caulk all inside and wiped with a damp sponge. Take my advice and be super picky because we didn’t do it perfectly and it does NOT sand off easy!

Use a good primer and use a brush for the “inside” of the cabinet first to get the inside edges. Then use a small roller to do the rest. Once that is dry on all the cabinets, go back with an enamel paint. Make sure to use a ventilated place or open windows! That is strong stuff!

Put the hardware on the cabinets and you’re done – phew! What a job! I think it turned out pretty good if you ask me. And, in case you are wondering we sold the house at our asking price! :D But in warning, only do this cabinet makeover if you have lots of free time and work well with your spouse LOL! I don’t think we would ever do this again.
Supplies Needed:
- 1/4″ MDF board cut at 4″ wide (depending on your cabinets)
- Wood filler
- Caulk gun
- Sherwin williams white enamel
- Sherwin williams primer
- Sponge/ Bucket
- Miter Saw
- Putty Knife
- Nail gun with air compressor
- Sander
- Face mask/goggles