Twig Tree Gift Tags
This post may contain affiliate links. Please read our Disclosure Policy.
Supplies:
- Dry twigs
- Cutting pliers
- Cardstock paper
- Scissors
- Paper punch
- Craft glue
- Twine
- Fresh green leaves – rocky mountain juniper
Instructions:
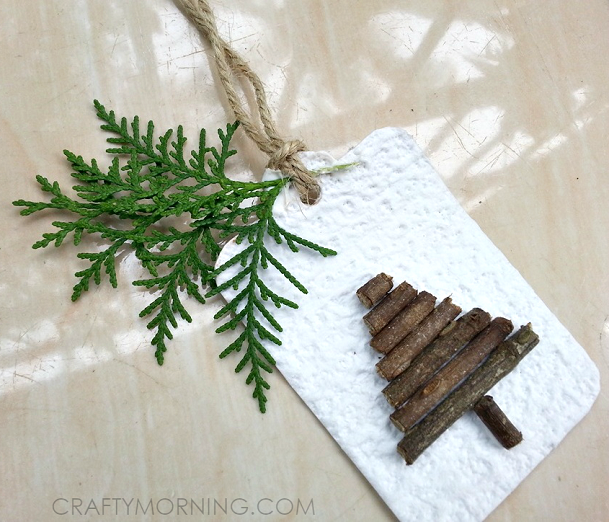
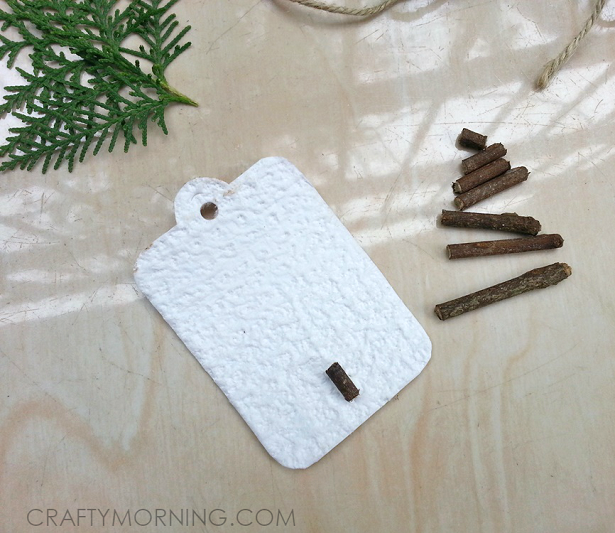
- Gather and prepare all the items. Cut a small piece from white cardstock, collect some fresh rocky mountain juniper leaves, cut twigs into different sizes and cut a small piece of twine.
- Trace a tag pattern on the cardstock paper and carefully cut out the pattern. Punch a hole on the top of the pattern, we’ll attach the twine or string through this hole.
- Take the twigs and craft glue. Start from the bottom side of the tree pattern. Glue the trunk part first and then glue all the twigs upwards. You’ll have to create a triangular shape, by gluing the longer pieces at the bottom and shorter ones on the top.
- Ones you’re done gluing all the twigs allow the glue to dry.
- Insert the twine through the punched hole and then insert the stem of the leaf through the twine’s knot. Glue the leaf with the knot if necessary. Now you can use it as a gift tag!