Clothespin Reindeer Ornaments
How to Make Reindeer Ornaments out of Clothespins
Here’s a fun new Christmas craft for the kids to make…clothespin reindeer ornaments! They are super easy with guidance.
This post may contain affiliate links. Please read our Disclosure Policy.
Almost all these items were purchased from the Dollar Tree store but you can find them at any craft store too. These are so cute hanging on the Christmas tree, they also make great gift bag attachments!

Clothespin Reindeer Ornaments
Materials
- Clothespins Wooden Spring-Style – Dollar Store
- Acrylic Craft Paint – Dark Brown
- 4 Wiggle Eyes Dollar Store
- 2 Pom Poms Mini Red Tinsel– Dollar Store
- Holly Leaves and Berries Mini – Dollar Store
- Natural Jute Twine – Dollar Store
- Skinny Ribbon – Christmas Plaid
- Glue Gun and Glue Sticks
- Paintbrush
- Scissors
Instructions
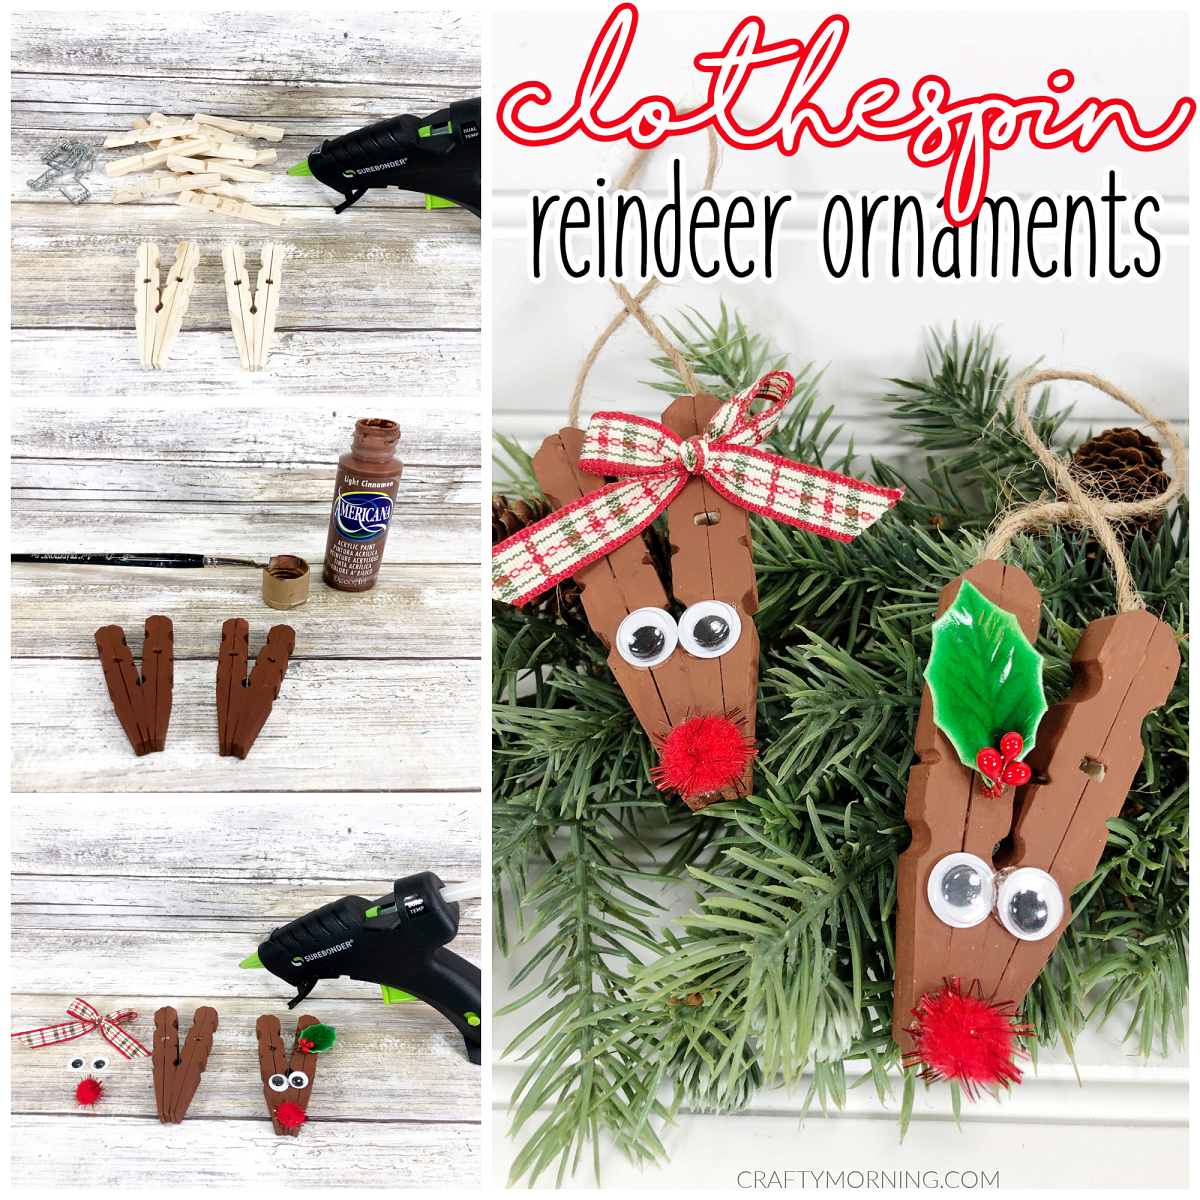
- Gather all supplies. Remove the metal spring from the wooden clothespins. For each Reindeer, line up two full clothespins on your work surface, to create a V shape. Attach the wooden clothespin pieces together with a glue gun and glue sticks, using the photo as a template.
- Paint the front and all sides of the clothespin Reindeers with dark brown acrylic craft paint. Set aside to dry and apply a second coat, if necessary.
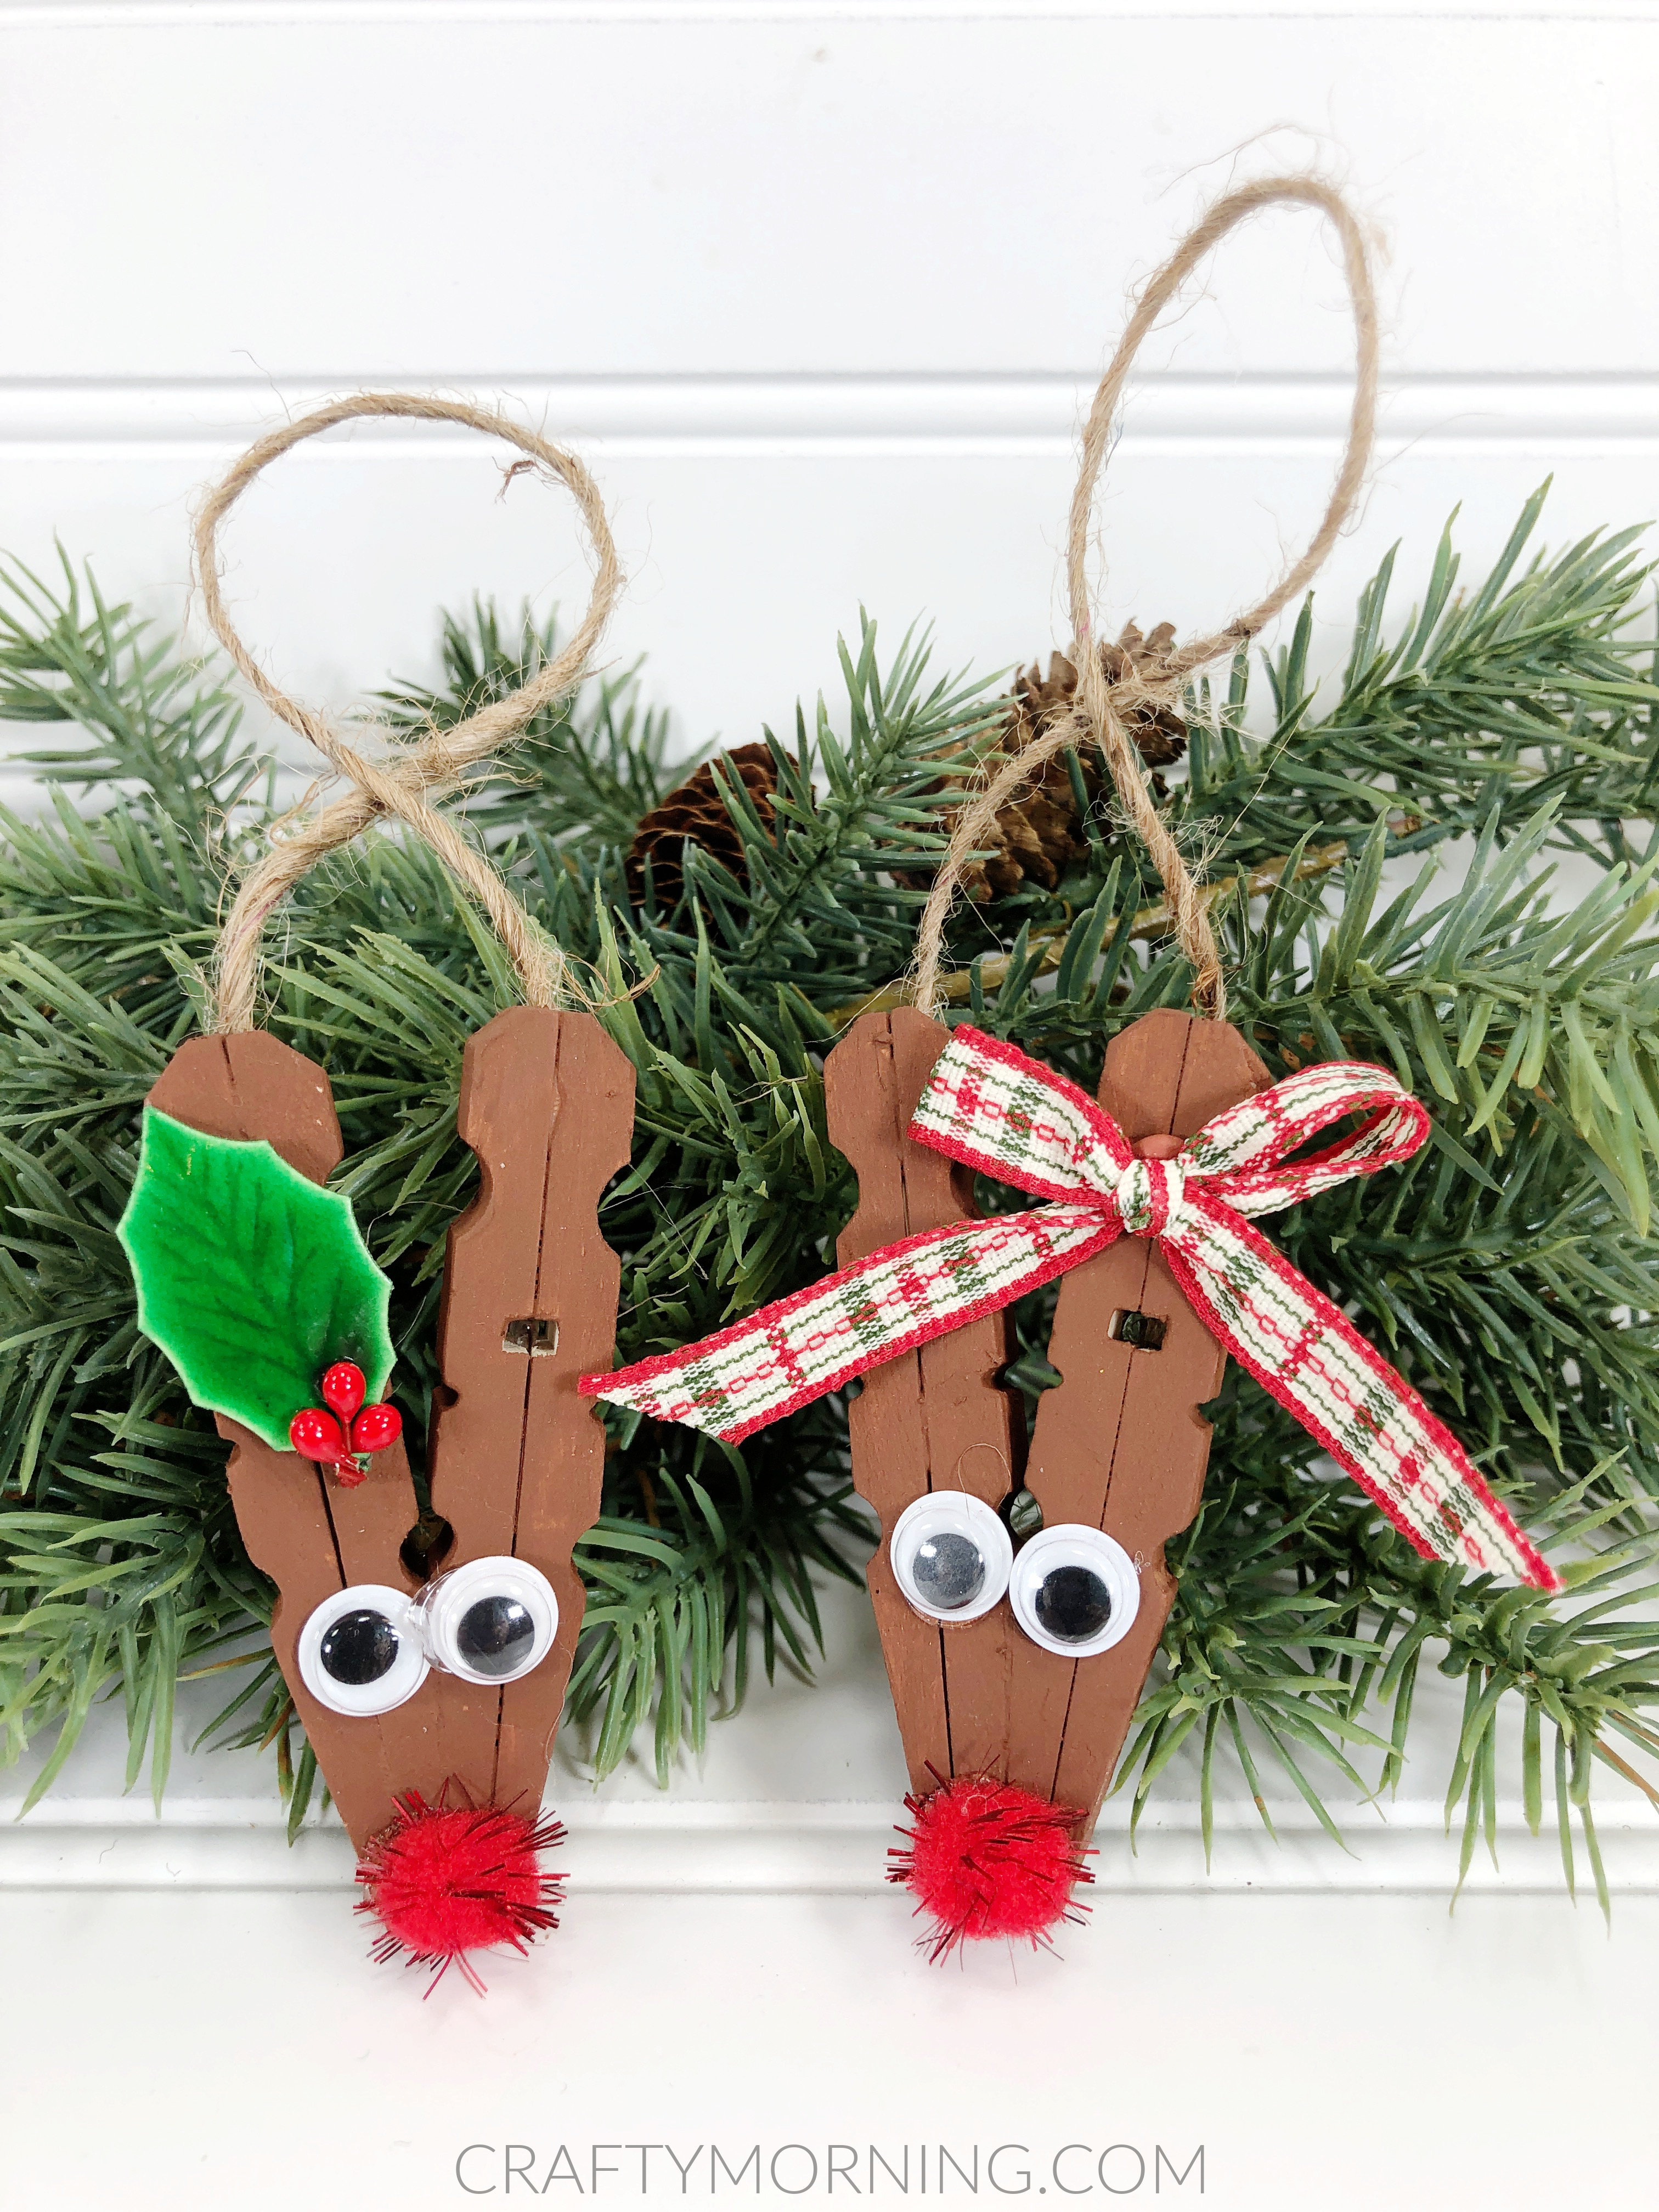
- Attach two wiggle eyes to each Clothespin Reindeer with a glue gun and glue sticks. Glue a red tinsel pom pom to the bottom of each Reindeer as the nose.
- Accent one clothespin Reindeer with a skinny plaid bow and the other with a mini holly leaf and red berries using a glue gun and glue sticks.
- Cut a 12” length of natural jute twine, tie it in a loop with a knot, and attach each side of the loop to the right and left side of the back of the Clothespin Reindeer with a glue gun and glue sticks.