DIY Christmas Napkin Decoupage Candles
How to Make Decoupage Candles
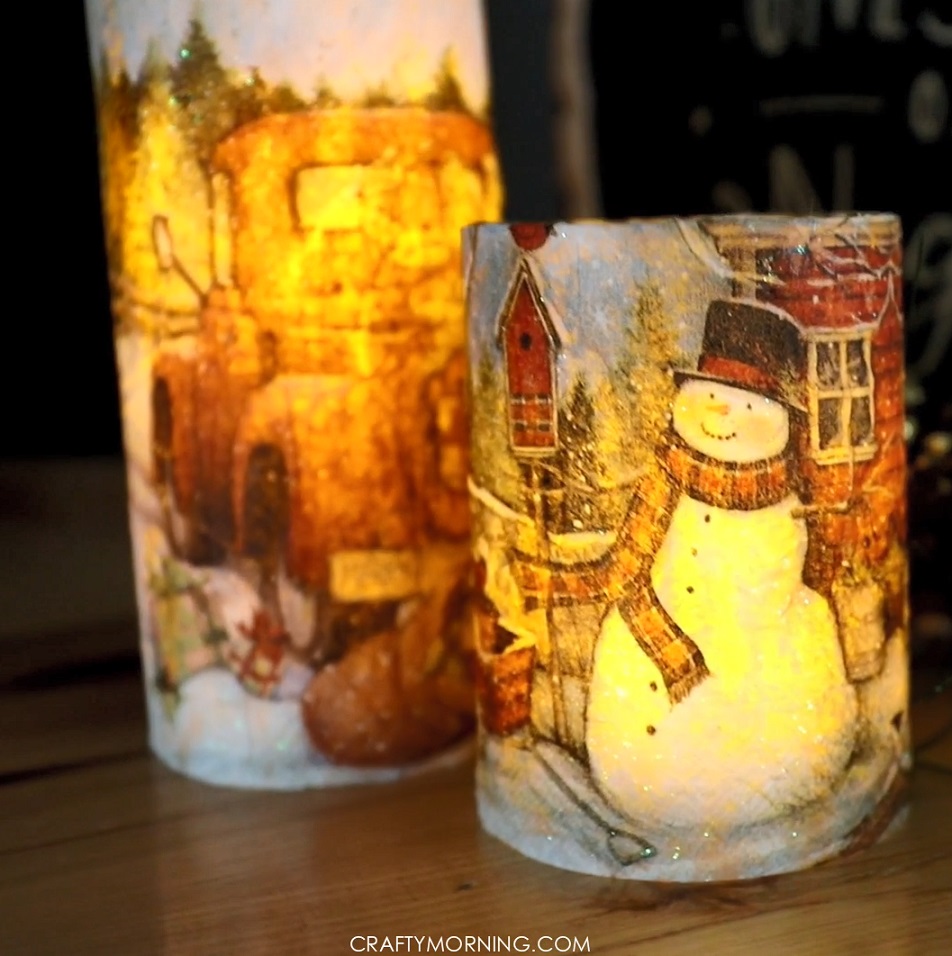
Christmas Napkins for Decoupage
I ordered these amazing Christmas napkins off Amazon last week and I finally got to decoupage my candles! They look so amazing and will be perfect for the holidays. You can grab the vintage truck napkins here or the snowman napkins here.
This post may contain affiliate links. Please read our Disclosure Policy.

I got my battery operated candles at Target. It’s kind of hard to find the flat rimmed ones now but I see some are on Amazon too.

My truck candle was my first attempt and I just slapped it on the glue with the plastic wrap and it got bunched up. Make sure you slowly smooth it over the candle after you apply the mod podge!
Watch me make them live in a video…

Christmas Napkin Decoupage Candles
Materials
- Red Truck Napkins
- Snowman Napkins
- Mod Podge
- Glitter Glue
- Battery Operated Candles with a flat rim on top
- Scissors
- Plastic Wrap
- Paintbrush
Instructions
- Start by opening up the napkin and measuring the height of the candle. You will want to factor in the extra rim around the tops too. Cut and set aside. (Optional: take off the second layer of the napkin, I did it the first time and it ripped easily though)
- Apply mod podge around the entire candle and top rim.
- Put a piece of plastic wrap down on the table and place the napkin upside down on top of it.
- Line up the bottom of the candle to the napkin in the middle. Smooth the napkin sides up over the candle and use the plastic wrap to get some texture/ press down the rim.
- Carefully unwrap the plastic wrap and let it sit on it until it dries (2-3 hours at least).
- Squirt glitter glue on a plate and use a paintbrush to dab it on the places you'd like. Let dry.
- Turn on the switch and enjoy!
Notes
You can seal the candles with mod podge or use a blow dryer and melt the wax a bit to make the napkin adhere to the candle.