How to Make a DIY Witches Cauldron
Pumpkin Bucket Bubbling Cauldron Craft
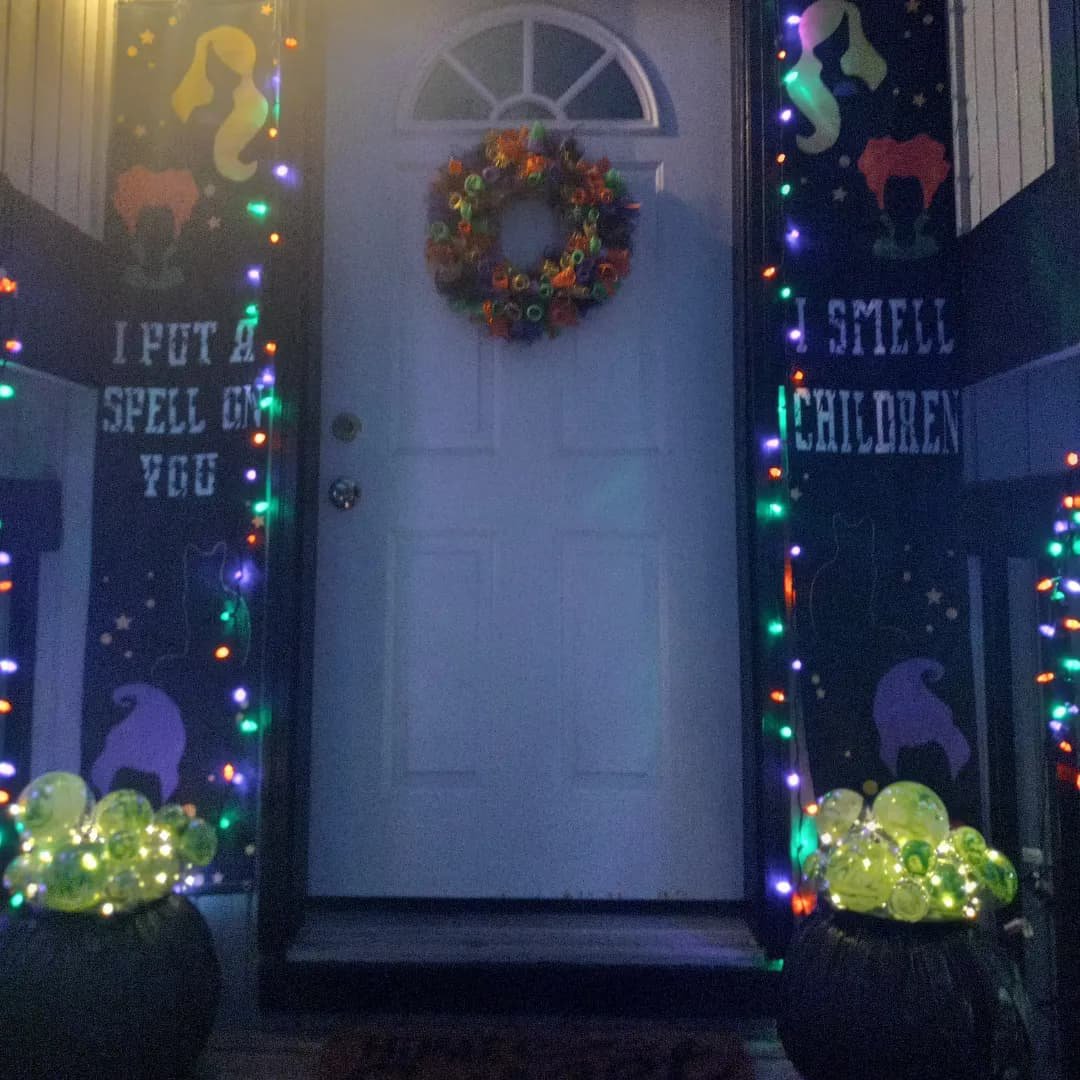
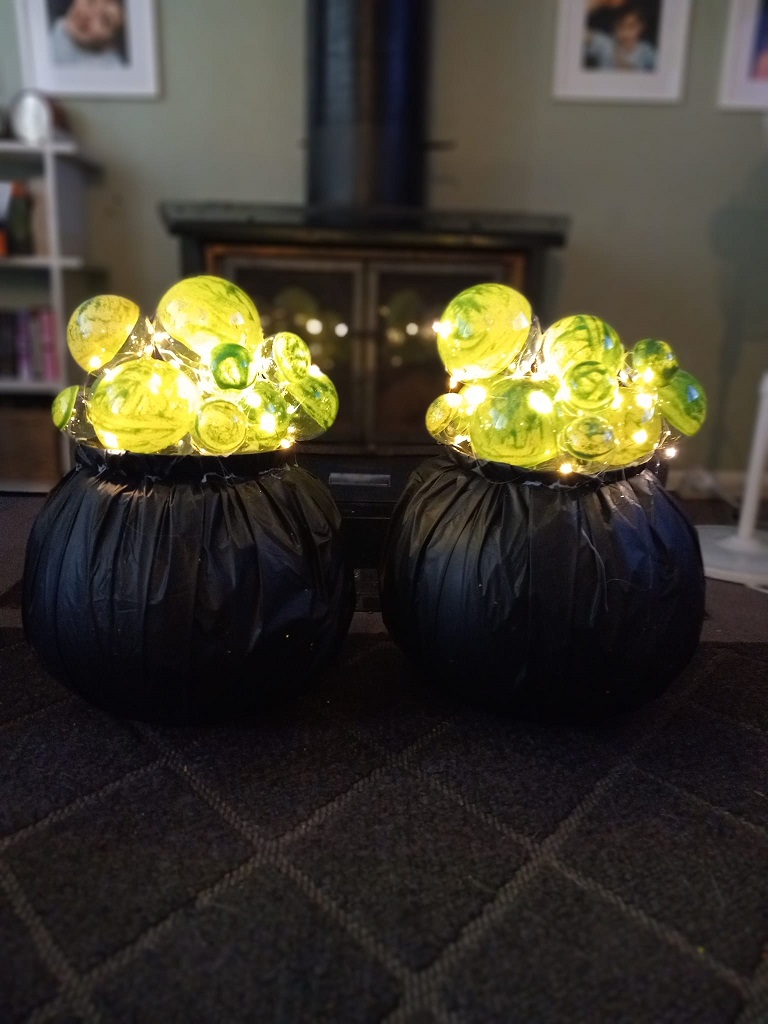
I stumbled across this adorable DIY witch cauldron bubbling with Christmas ornaments! Cassandra Martin was so sweet to write us a tutorial on how she made them! They go perfect with her Hocus Pocus outdoor decoration theme. Also, make sure to check out all our plastic pumpkin bucket crafts!
Cassandra said “I saw a craft where somebody used clear ornaments to make bubbles and that gave me idea to make a cauldron. I bought these huge pumpkins at Target a few years ago that I knew would be perfect however I knew I wanted to reuse them in the future so instead of spray painting the pumpkins I decided to use black tablecloths to wrap them. You could definitely get plastic pumpkins and spray paint them black. All the items that I used except for the pumpkins were purchased at the Dollar Tree.”
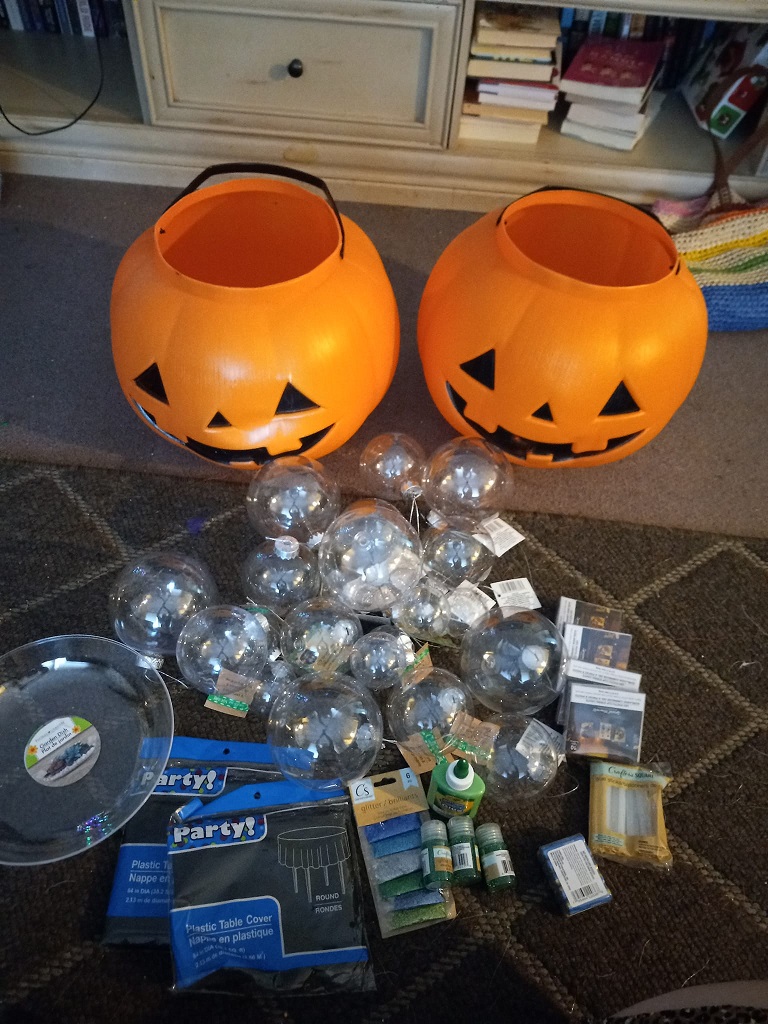
You’ll need the following items to make one cauldron:
- 1 large plastic pumpkin
- 1 clear plastic
- Garden plate
- 2 battery operated string lights
- 2 AA batteries
- 1 round black tablecloth or black spray paint
- 1 container green glitter
- 1 Neon green color glue
- Hot glue sticks
- Hot glue gun
- Clear ornaments in various sizes. I used 3 large, 4 medium, 4 small. Depending on the look you want to give you can definitely add more to give it more of a bubbly effect.
Step by Step Instructions:
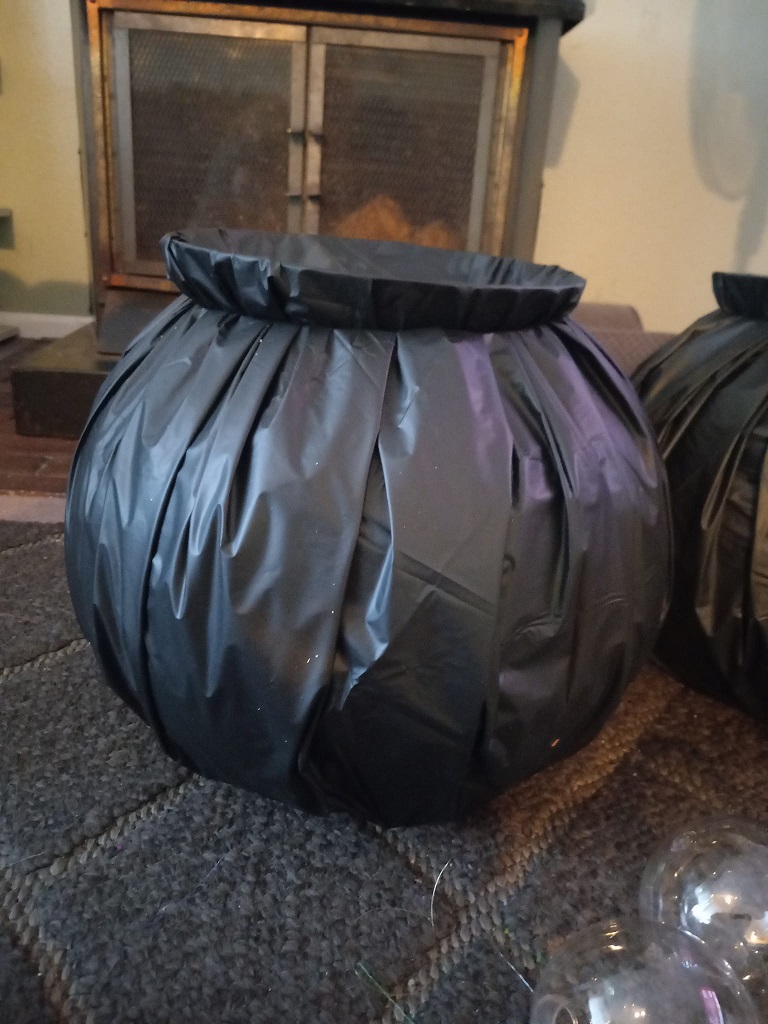
- I started out by wrapping my pumpkin with black tablecloth. I just set the pumpkin in the center of a round black tablecloth and brought the tablecloth up and around it. I twisted the tablecloth so that it would stay. I then took the Garden plate and put it on top of the pumpkin and then wrapped the excess around the plate and tucked that in. I use hot glue to glue the tablecloth seam between the Garden plate and the Pumpkin.
- The next thing I did was get all my clear ornaments and remove the silver tops off. These won’t be getting used so you can either save them for another project or throw them away.
- The Next Step I did was Squirt some green colored glue and sprinkle some glitter inside the clear ornaments and then with a small paintbrush I just mixed it all around inside the ornament. I use green because I really wanted it to give a Halloween witch vibe for The Cauldron.
- Once I painted inside all my balls I then started to hot glue them place on top of the wrapped Garden plate. There’s no wrong way to do this. I just started with the big ornaments first and then worked my way around with the different sizes. I used hot glued to glue them to each other and to The Cauldron itself depending on the placement. Continue doing this until you run out of ornaments.
- The last thing I did was take battery operated string lights and weave them through the “bubbles”. This is so easy to do because you’ll notice there little gaps that you can do this through. I definitely recommend weaving the string lights through the bubbles because it will enhance the “bubbles” glow. I made sure the battery packs would be in the back and accessible to change out batteries and access the on/off switch.