DIY: How To Make A Wine or Magazine Rack Out of a Wood Pallet (Step by Step Tutorial w/ Pictures)
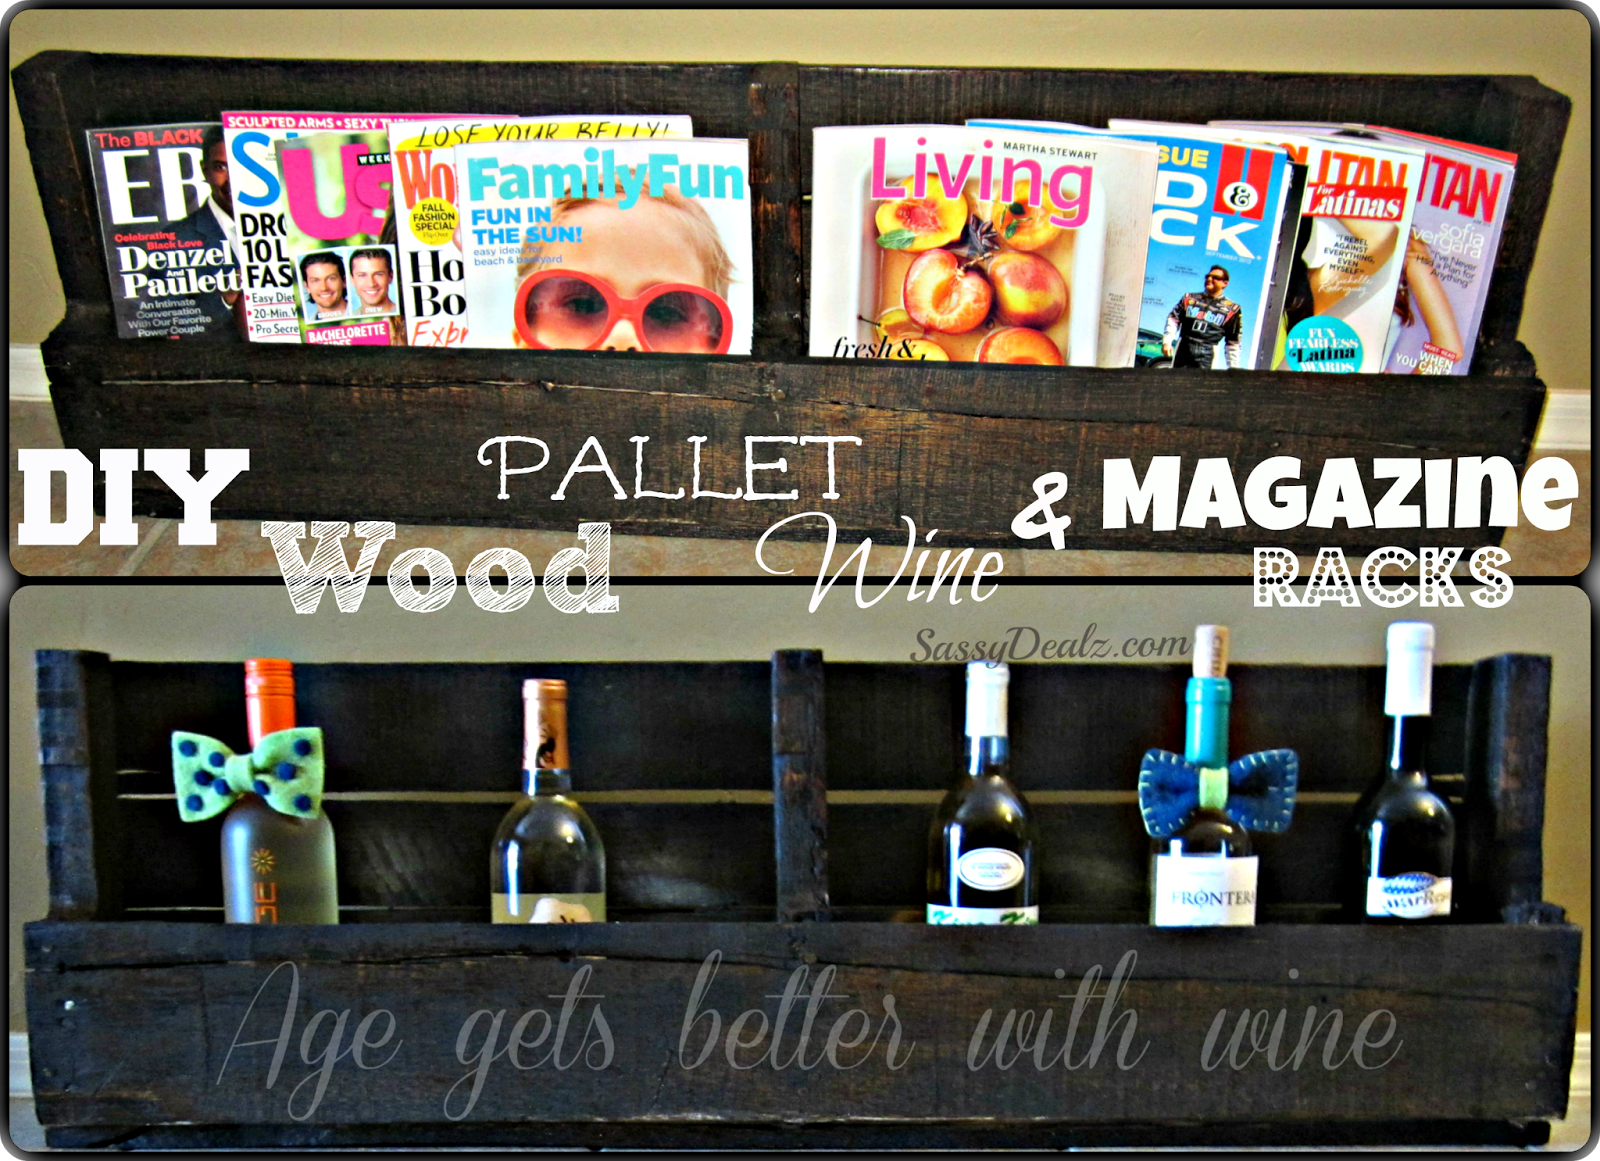
If you are looking for a very inexpensive way to make a wine rack, magazine holder, or a kids book shelf read on! Here I give you the instructions step by step using pictures of my husband building it hehe! Lets begin…
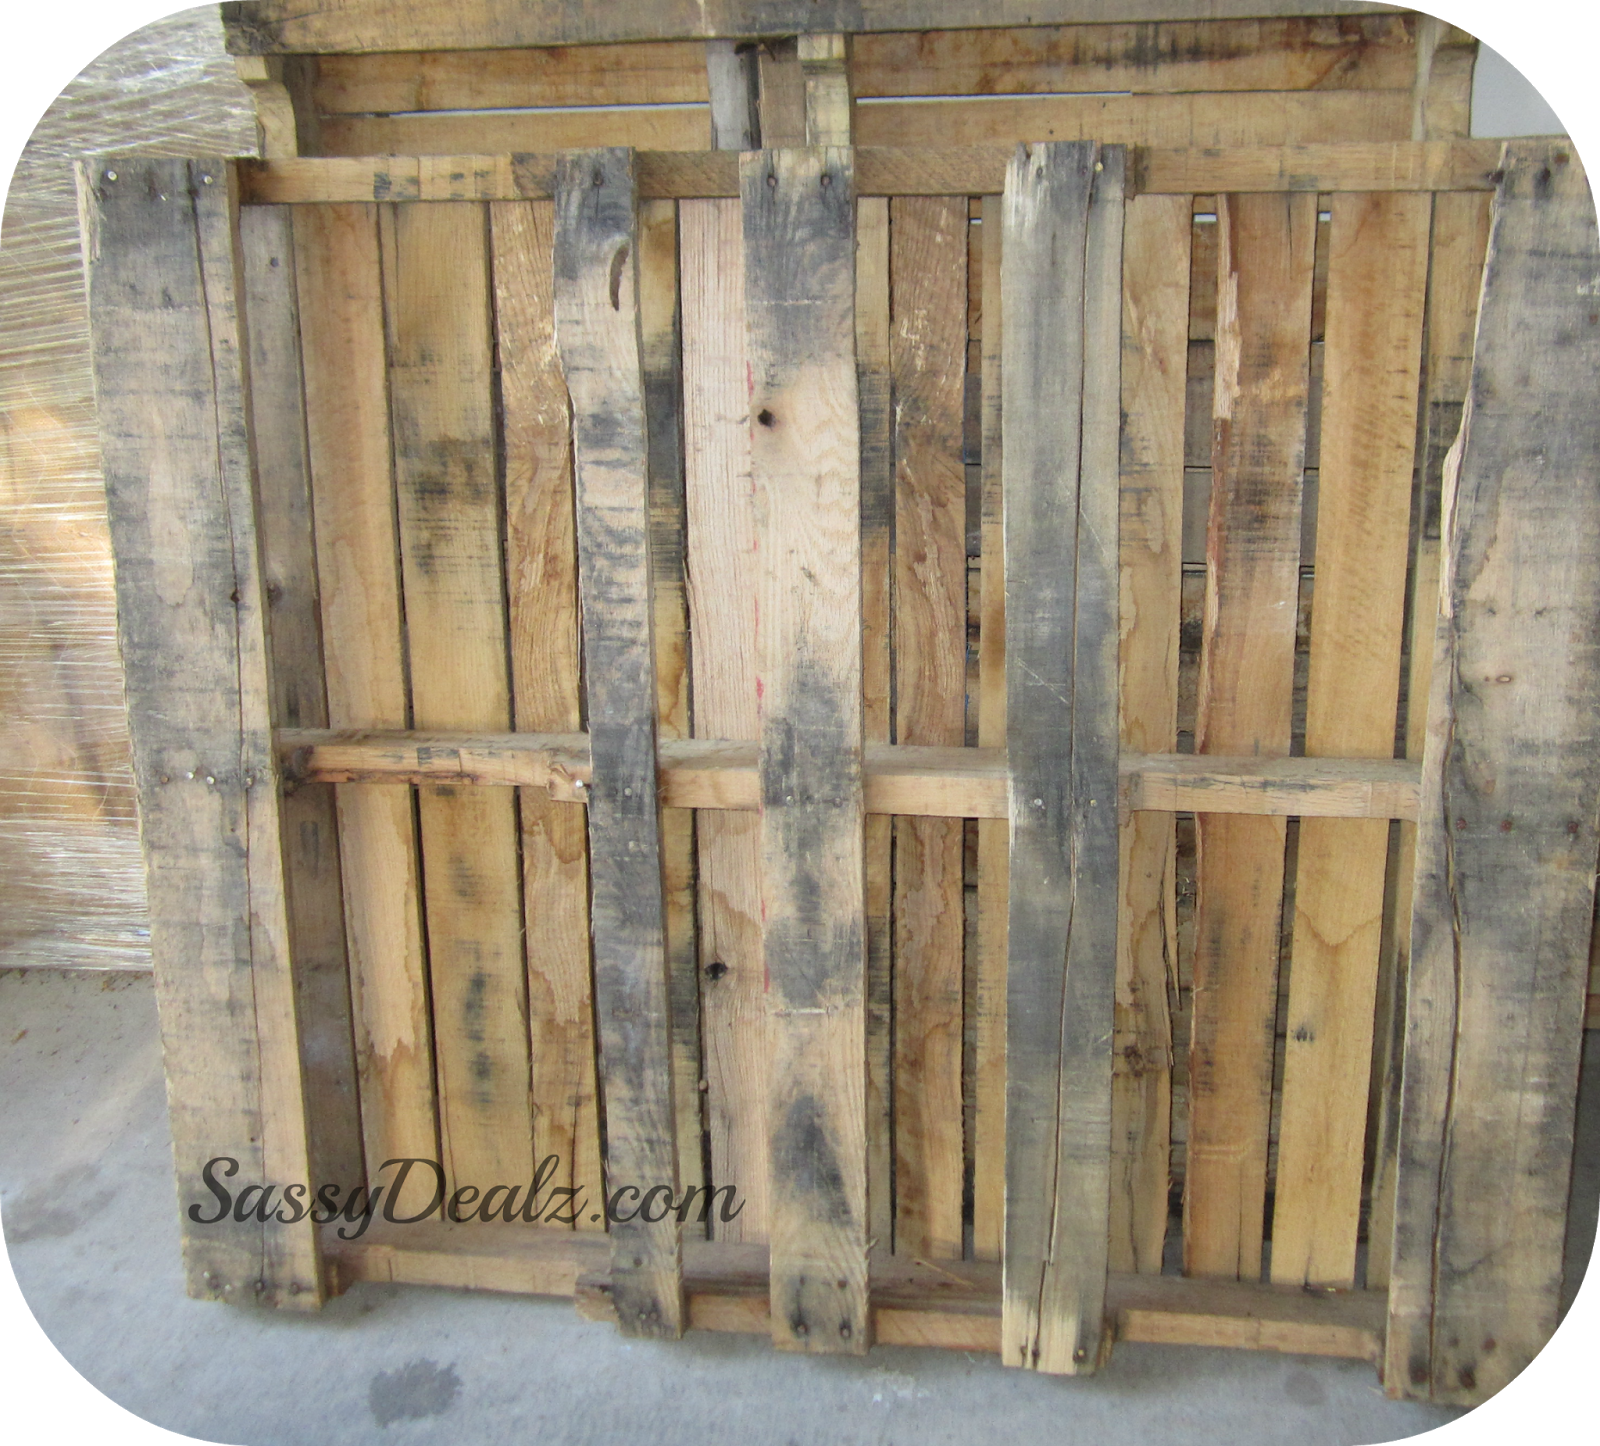
The first big obvious step to make a wine rack is to FIND a free distressed wood pallet ;) I called my local Ace Hardware store and they gave me two pallets for free! They even loaded them into my truck, what a deal.

The materials you will need include a saw, a sander + pads, a tape measure, wood stain, a paint brush, 6 screws, and gloves (for staining).

Before cutting right into the wood pallet, stick a wine bottle in and measure how tall you want it to be. Mine was about a foot where I decided to start, and drew a line with a pen.
This post may contain affiliate links. Please read our Disclosure Policy.
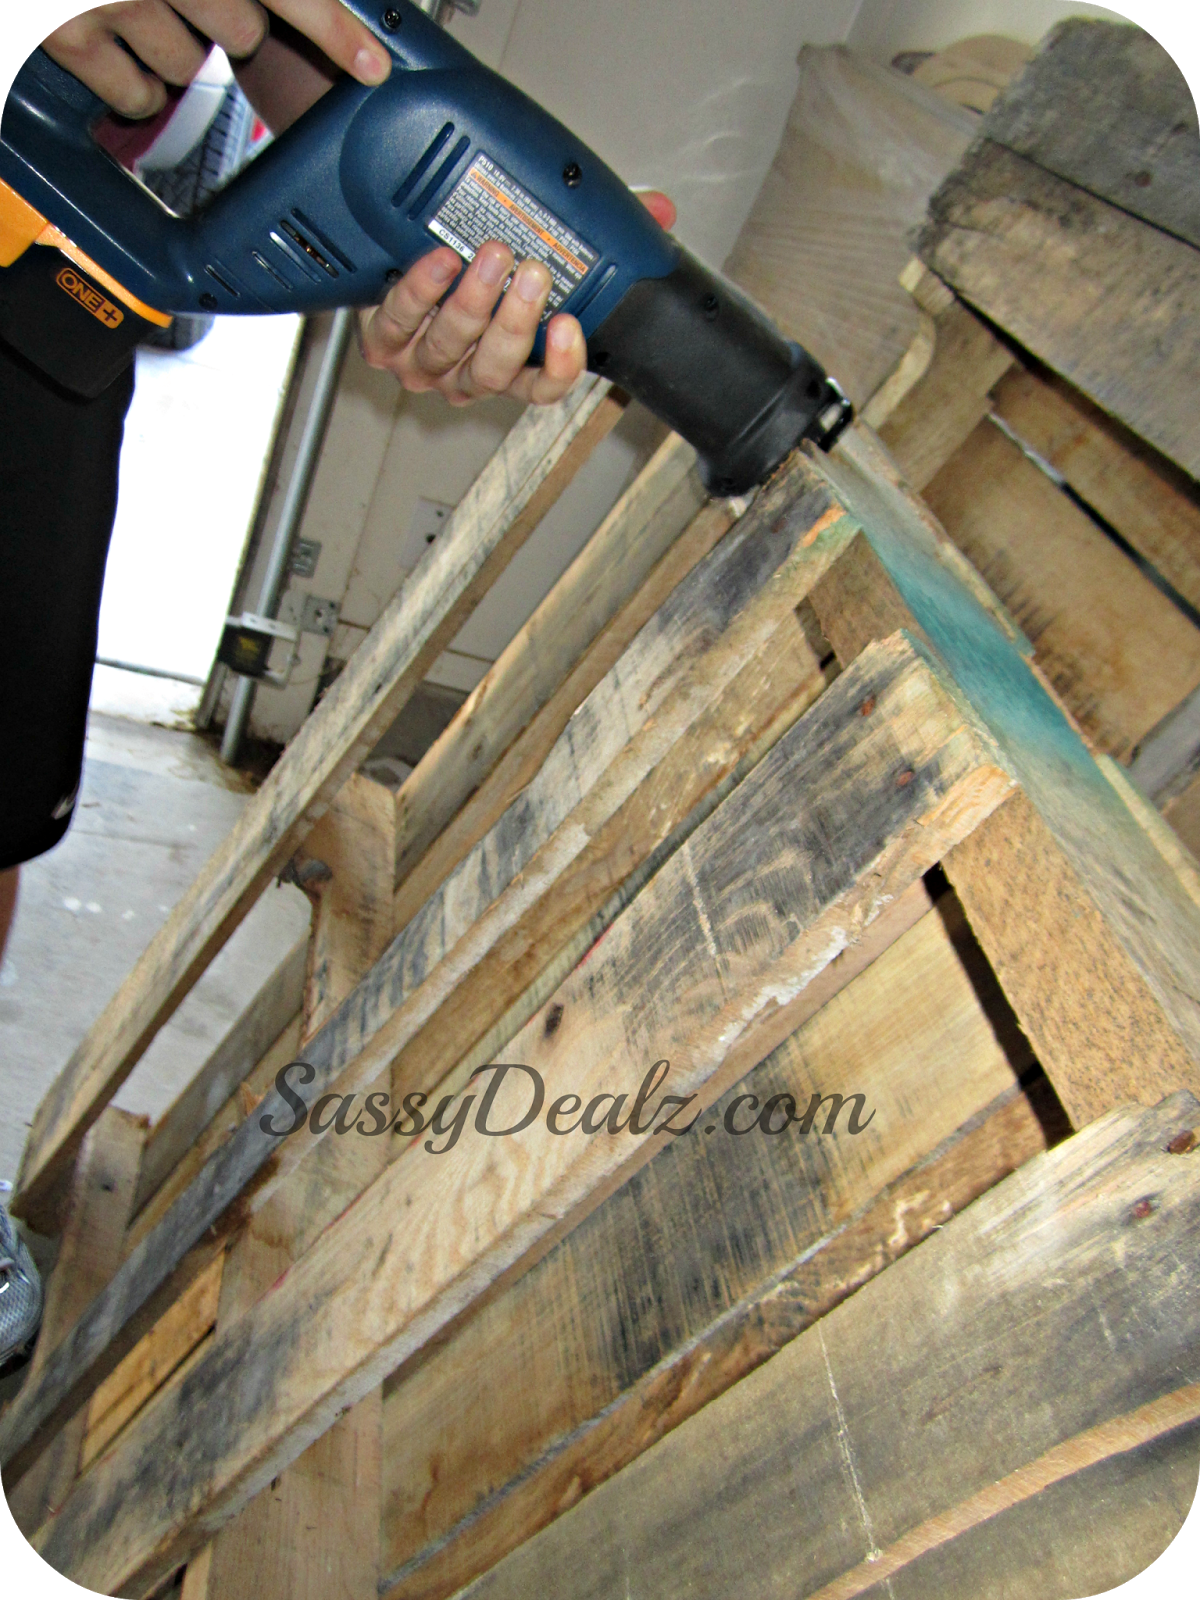
Get your saw and start cutting on the line you drew at the top. If you want to make it super easy on yourself, just start cutting where there already is a space between (that’s what we did!)
Then you can just move down to the middle and bottom! It literally takes a minute to do this if your saw is fully charged.

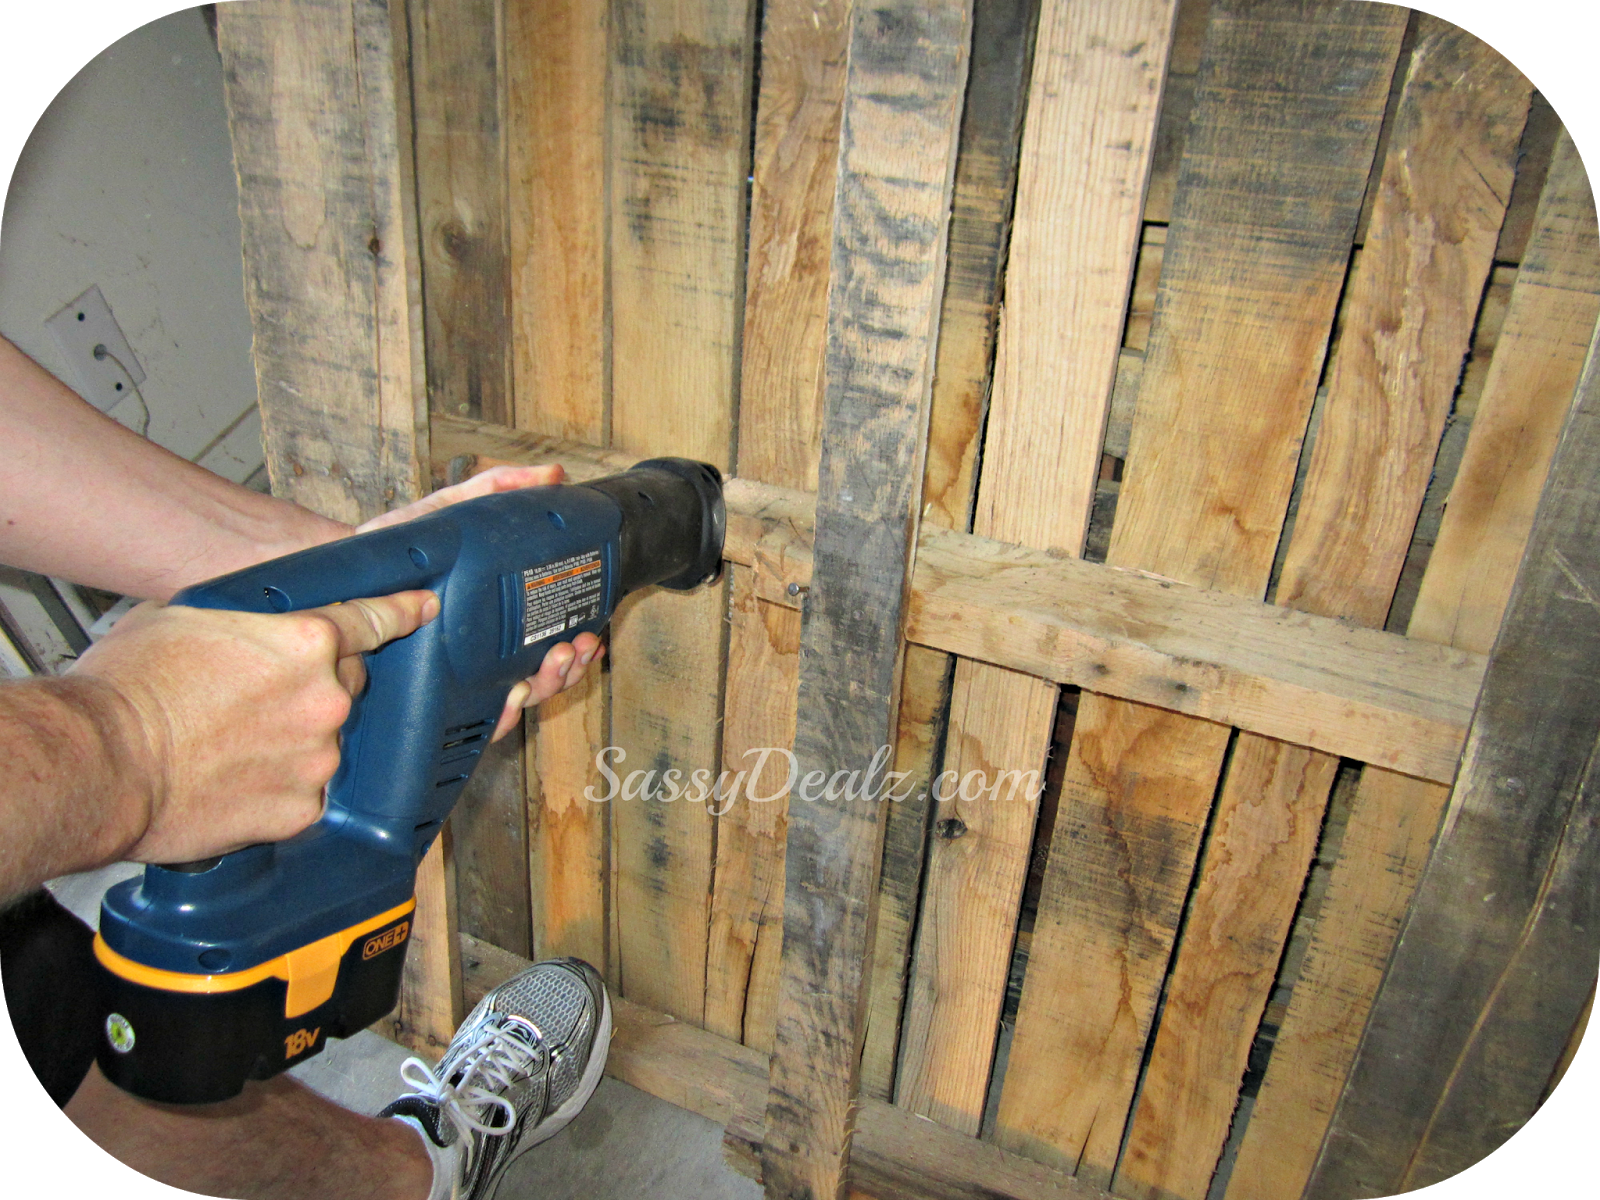
Taa-daa! Now it is finally cut off from the rest of the board and is starting to look like a wine holder! But don’t get rid of the extra wood pallet just yet…

You will need to pop off an extra board to attach to the bottom of the wine rack so the bottles wont fall out!
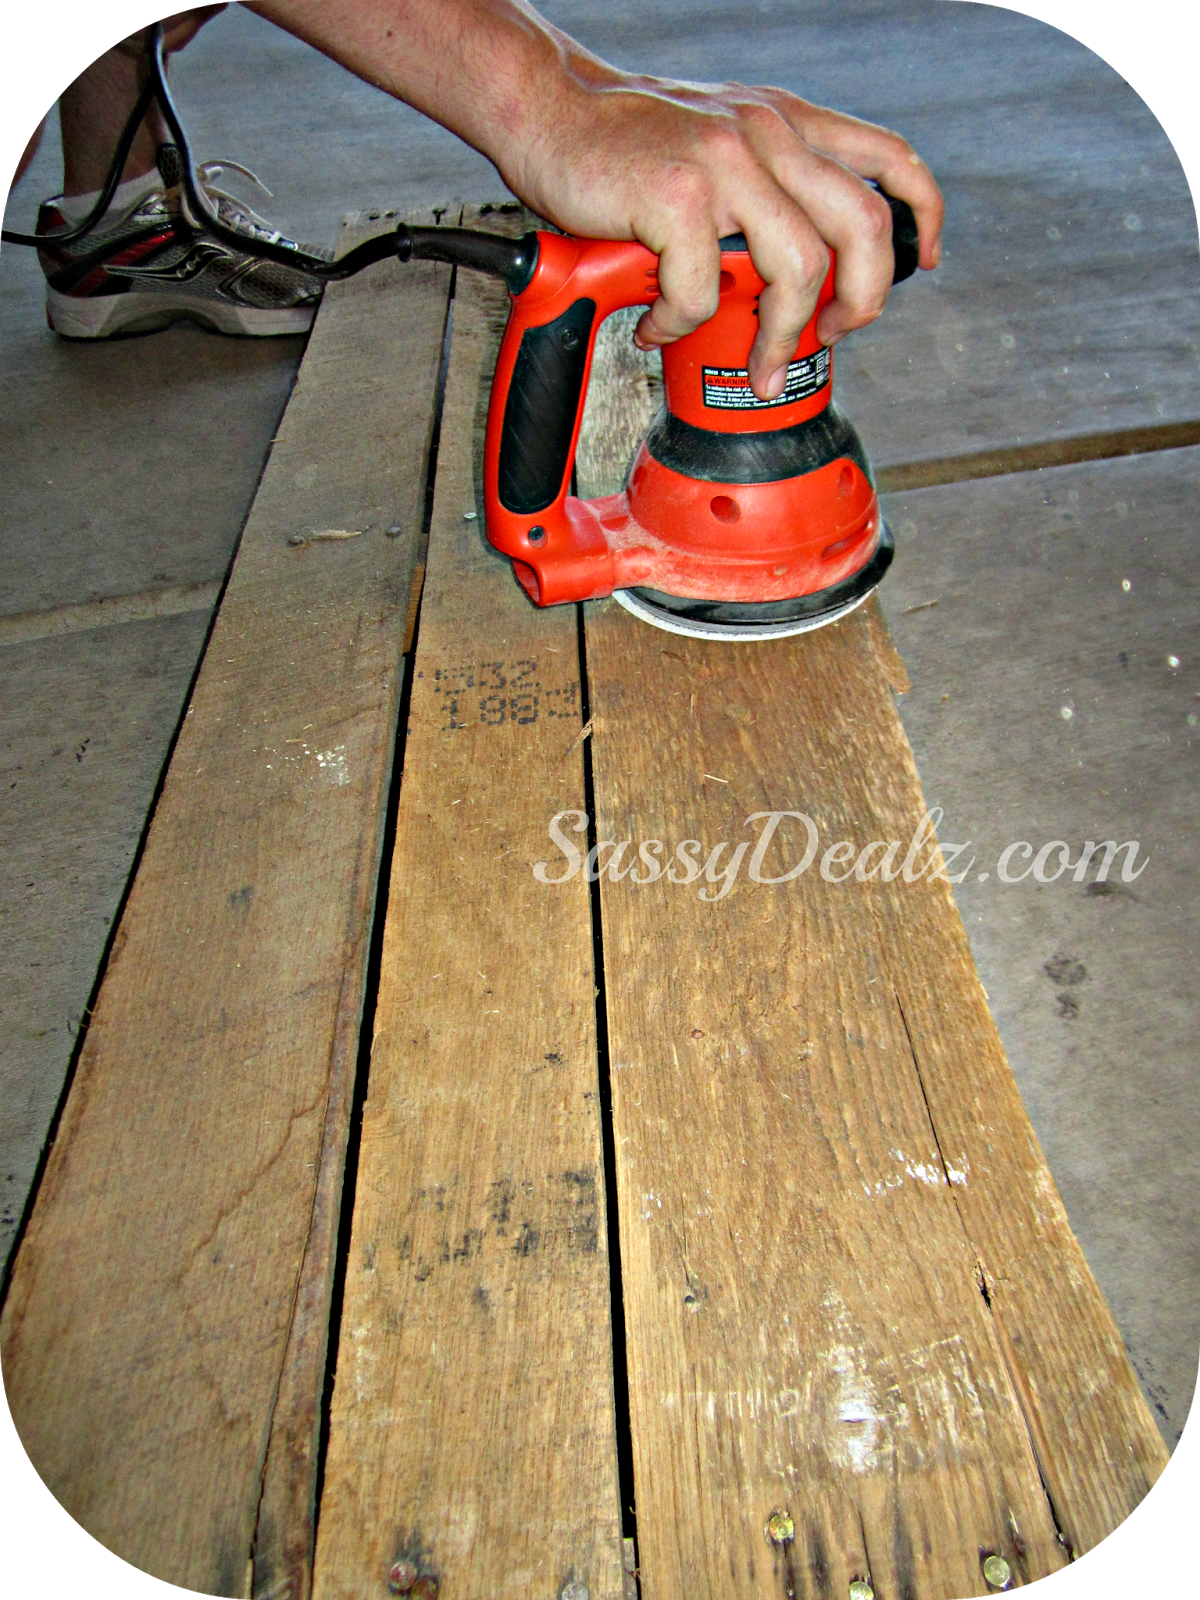
Your pallet will probably be dirty, rough, and have splinters sticking out all over (mine did!) Therefore you will need to get out your sander and smooth every side possible of the wine rack!

Yay! Now that it’s all silky smooth you can go ahead and start staining your masterpiece. We chose to use “Minwax” Wood Finish in the color Dark Walnut. I wanted it to be dark so we just left the stain on overnight instead of wiping it off.

Don’t forget to stain that extra board you took off! This is the bottom of the rack so you can paint just one side if you don’t care about what it looks like on the inside. (I cared so it took two days to finish hehe)

After your stain is completely dry, you can flip it over and nail the bottom board to the rest of it, we used 6 screws. Note you will have to stain the bottom too if you don’t want that showing.
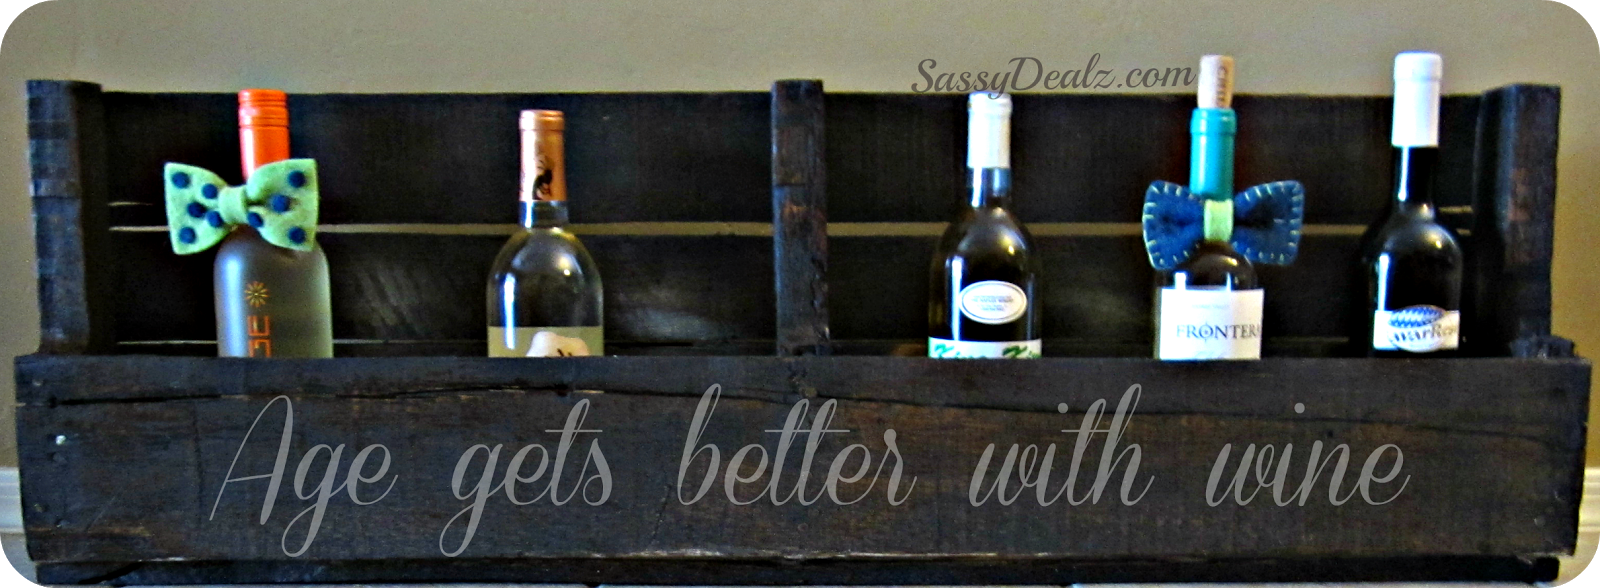
The last step is to put the backing on to hang it up, using either wire or hooks. We haven’t done that yet but here’s our finished product! Can be used as a wine rack, magazine holder, or a kids book shelf! I added the quote “Age gets better with wine” which you can stencil on later! (I used photoshop :)

Let me know if you make your own in the comments!