Nail Polish Marbled Easter Eggs

This post may contain affiliate links. Please read our Disclosure Policy.
If you have a ton of old nail polish laying around, get it out and have some fun this Easter! Make some nail polish marbled eggs with the kids. **DISCLAIMER** Do not eat the eggs after!!

Supplies:
- Eggs
- Room Temperature Water
- Bowls
- Cheap Nail Polish
- Nail Polish Remover
- Plastic Gloves
- Toothpicks
- Craft Foam
- Flat head pins
Instructions:
- Prepare your eggs. You can hard boil your eggs or use a small needle to blow the eggs out. If you blow the eggs out, you will be able to save them and use them year after year!
- In a piece of craft foam, place nails in. This will allow your eggs to dry without having to be fully set down.
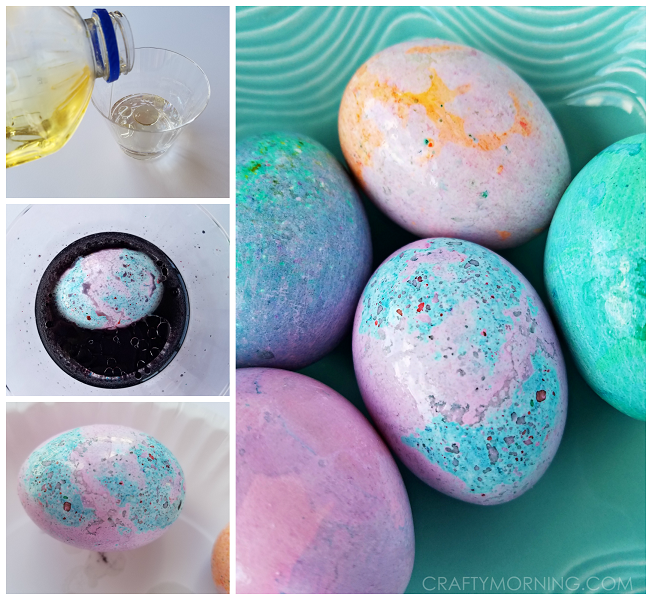
- Fill a small bowl with room temperature water.
- Pour nail polish in a swirling pattern on the water. If the water is the right temperature, the polish should float to the top.
- You can mix different colors or stick to one color.
- Use a toothpick to create a swirling pattern.
- Put your gloves on. Dunk your egg into the polish water and set on the nails to dry. You will be able to usually get half of the egg dyed at once.
- Allow to dry and then repeat on the other side if desired.