Salt Painting Snowflakes
Easy Salt Painting Craft Idea
Looking for a fun, easy winter craft to do with the kids? Salt painting snowflakes are such a hit at our house! It’s part art project, part science experiment, and totally magical to watch. The best part? You probably already have everything you need sitting in your kitchen. Make sure to also try our other salt snowflake painting, too!
What You’ll Need:
- Table salt
- White glue
- Watercolors
- A little water
- Paper
Here’s How to Do It:
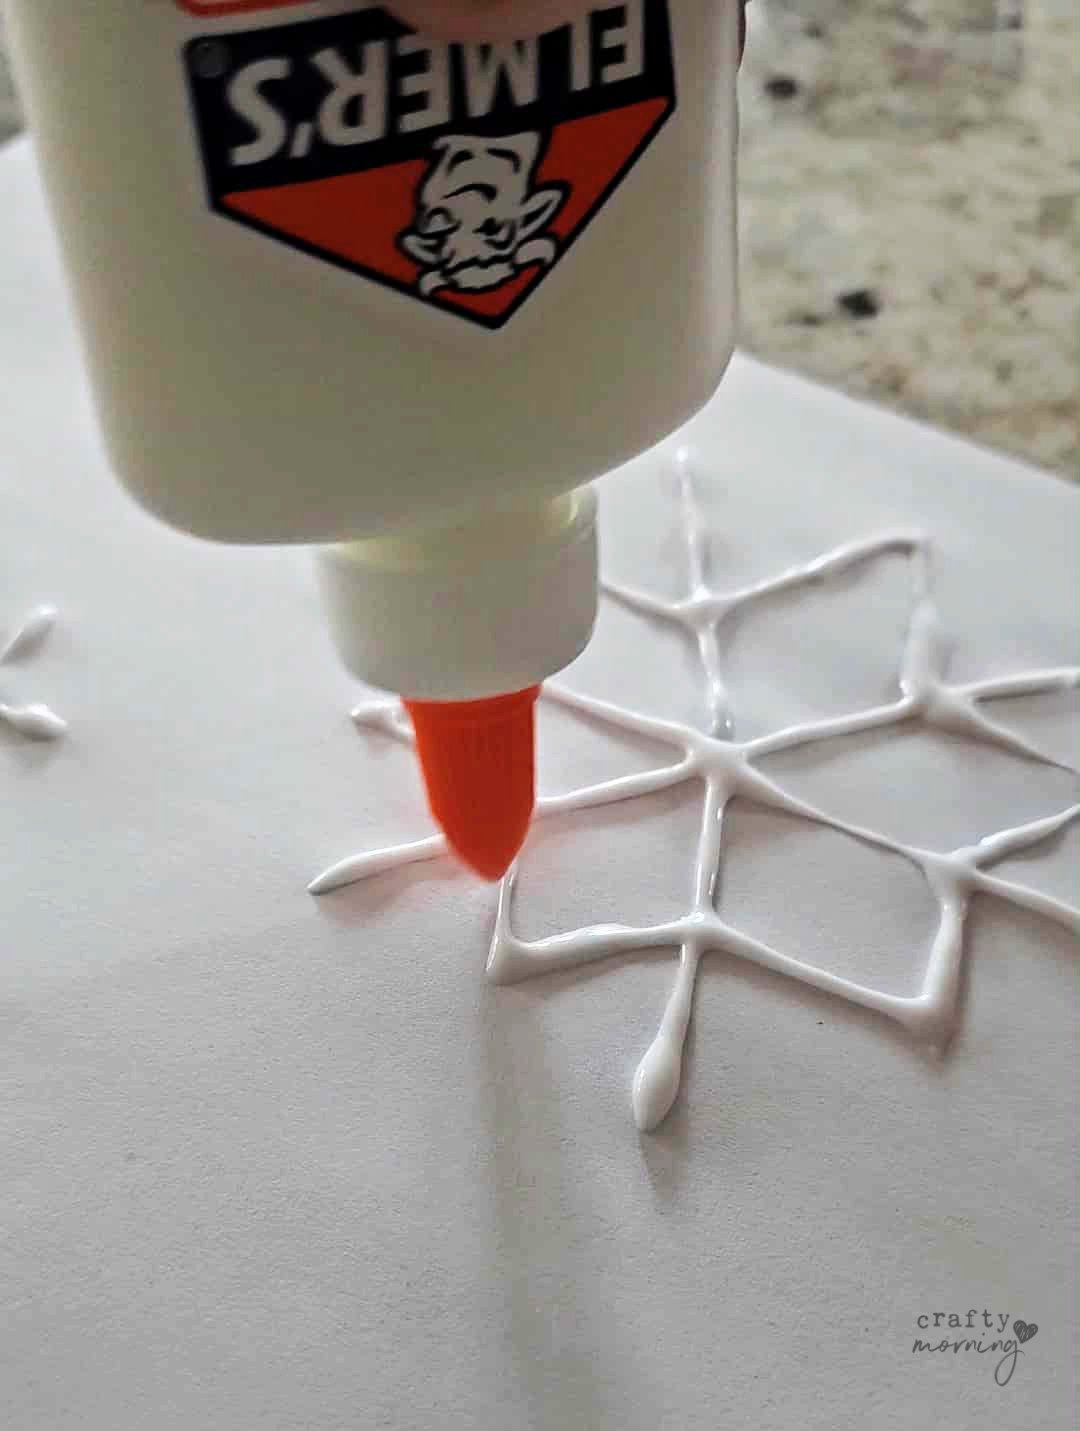
Start by drawing snowflakes on your paper using the glue. You can make them simple or fancy—whatever your kids are into! I like to set the paper inside a cookie sheet before the next step to help contain the mess (because you know salt is going everywhere otherwise).
Next, have the kids sprinkle salt all over the glue lines. Make sure they cover the snowflakes completely—this part is oddly satisfying! Then, gently lift the paper and tap off the extra salt. Let it dry for a bit (this is the hardest part for my kids—they always want to paint right away!).
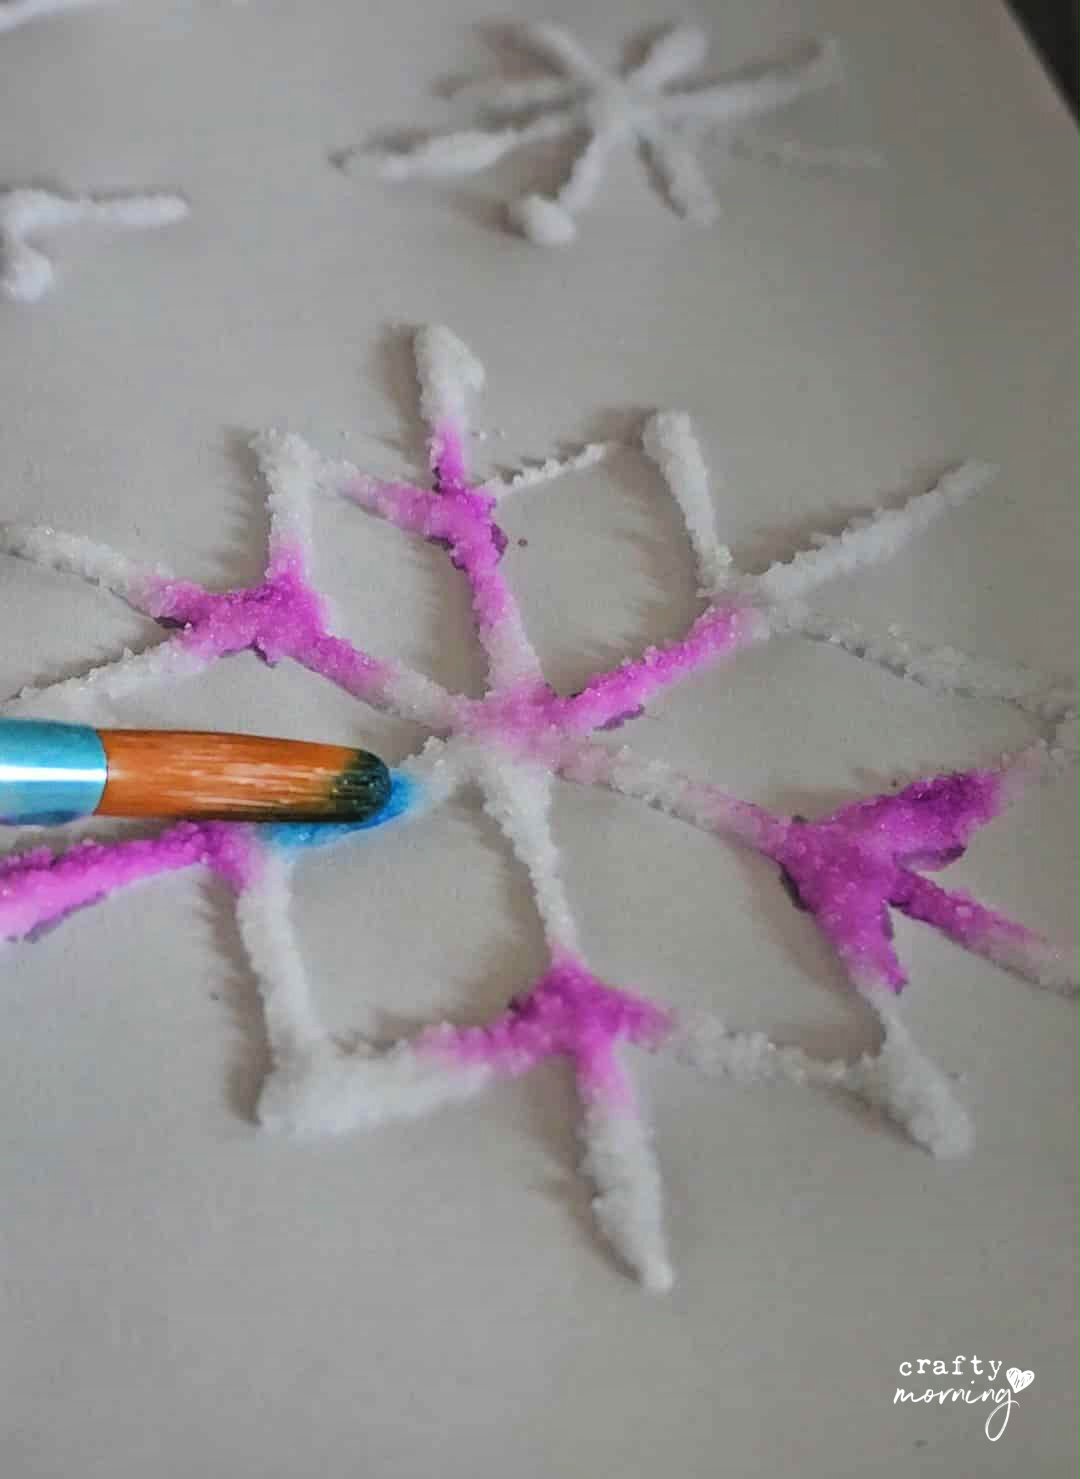
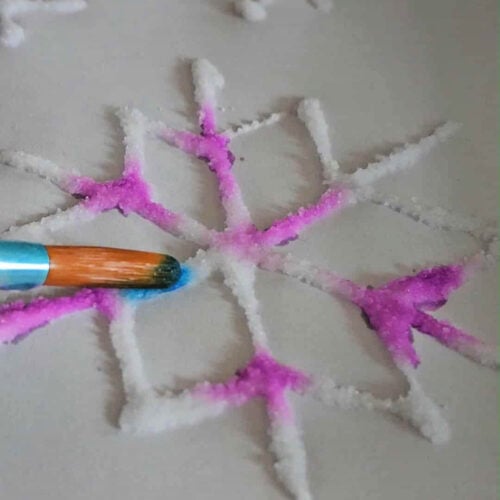
Once the glue and salt are dry, grab your watercolors. Dip your brush in the paint and lightly touch it to the salted glue lines. The color spreads and dances along the salt—it’s so fun to watch! The kids love seeing how the colors mix and flow.
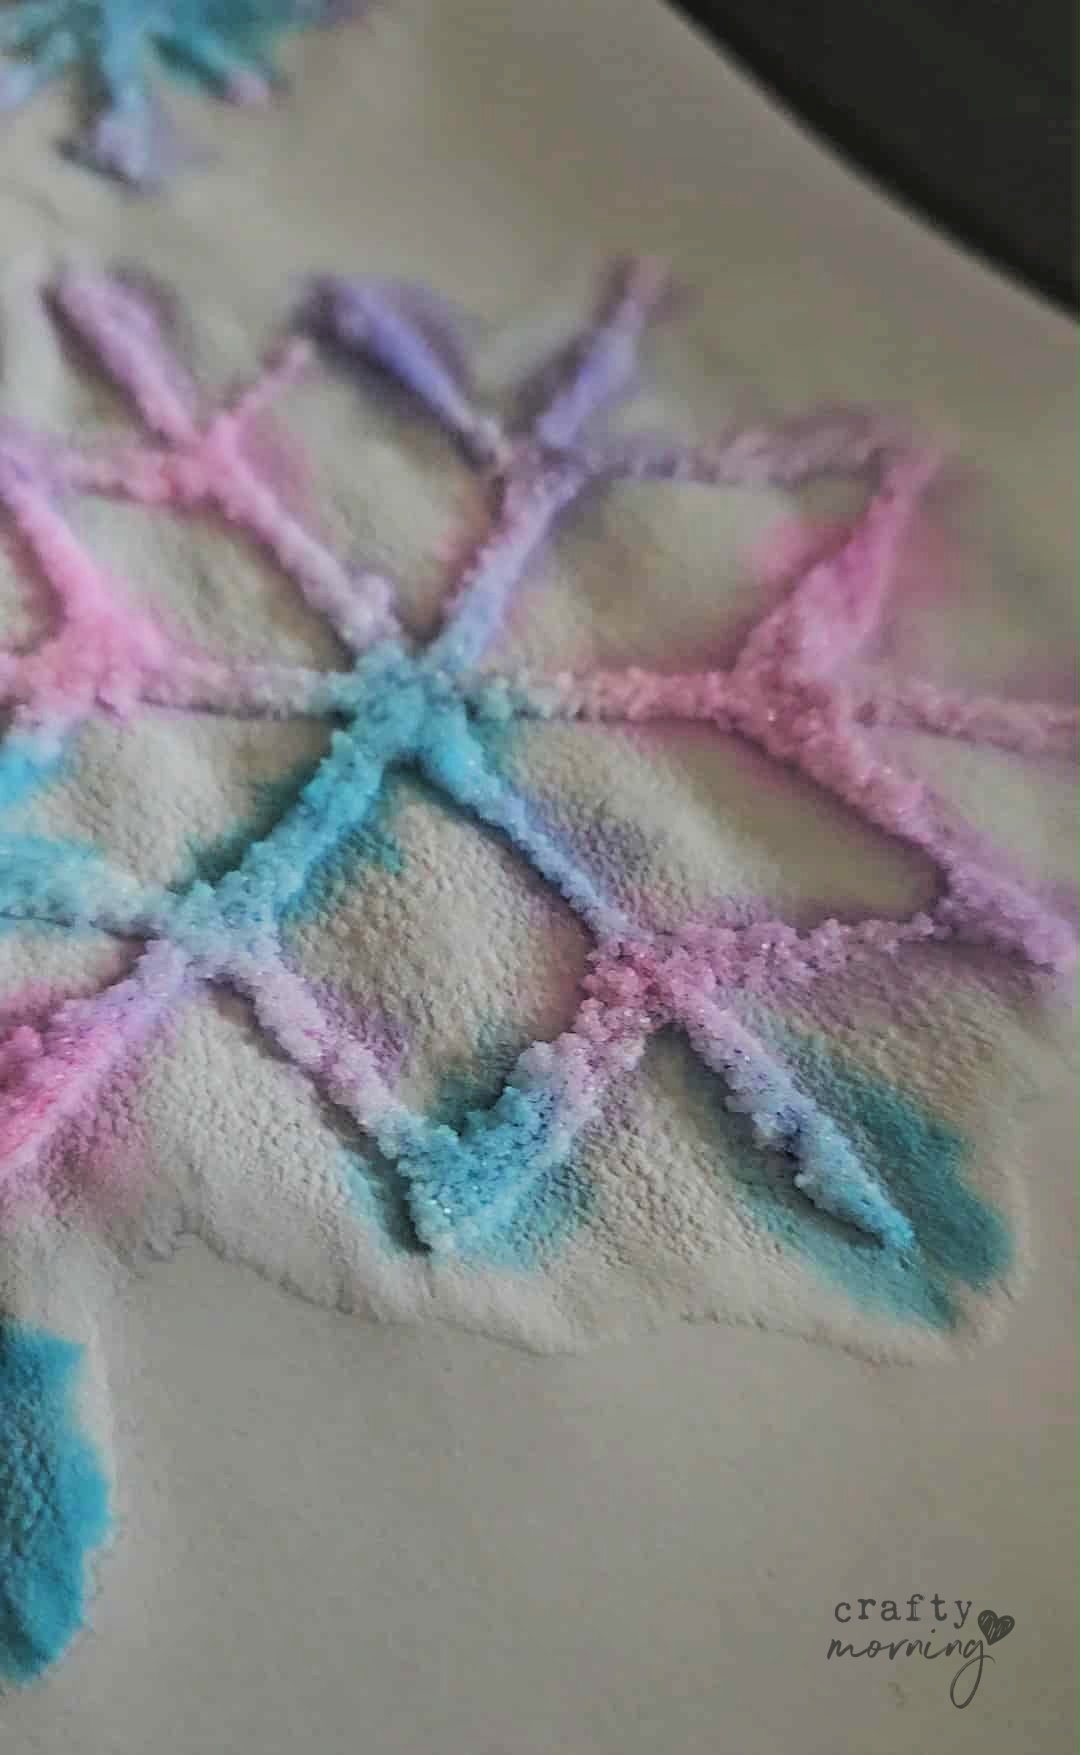
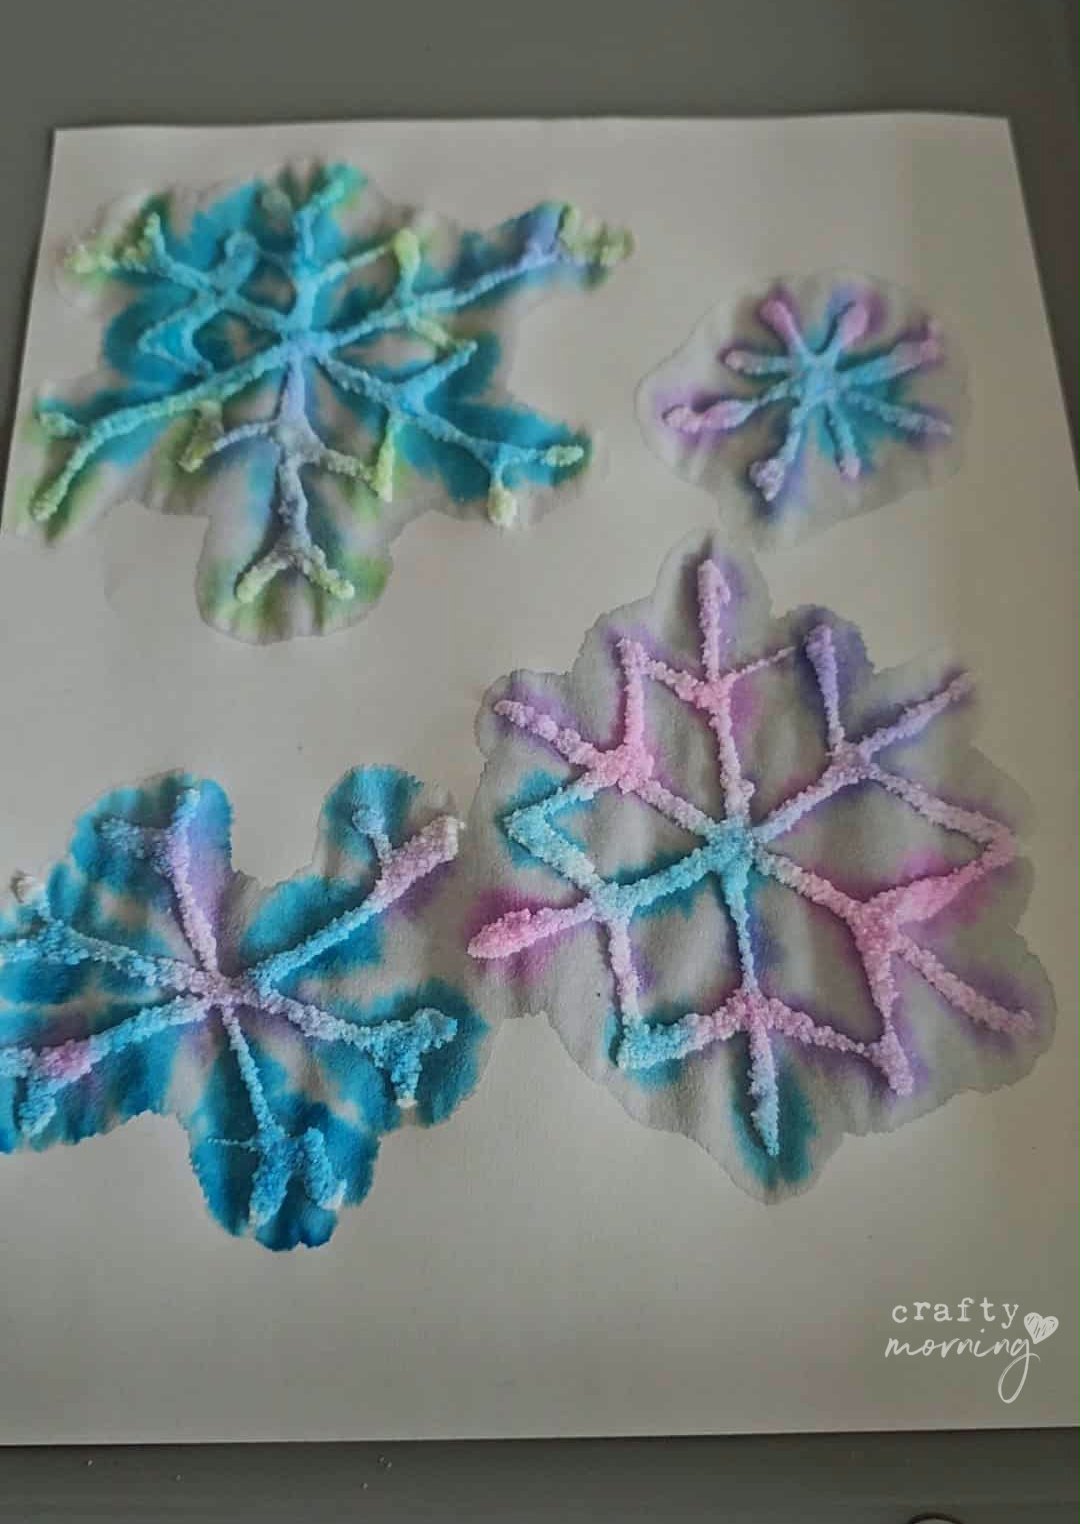
When everything dries, you’ll have the prettiest, shimmery snowflakes that look like they were dusted with real frost.
Salt Painting Snowflakes
Materials
- Table salt
- White glue
- Watercolors
- Water
- Paper cardstock would be more sturdier
Instructions
- Start by drawing snowflakes with glue on a piece of paper.
- Place the paper inside of a cookie sheet. Have the kids pour the salt to cover the entire snowflake.
- Slowly lift the paper up to get the excess salt off. Let dry completely.
- Use watercolors and press a paintbrush against the salt to watch it expand!