Rust-Oleum Cabinet Transformation Review (Before & After Pictures)
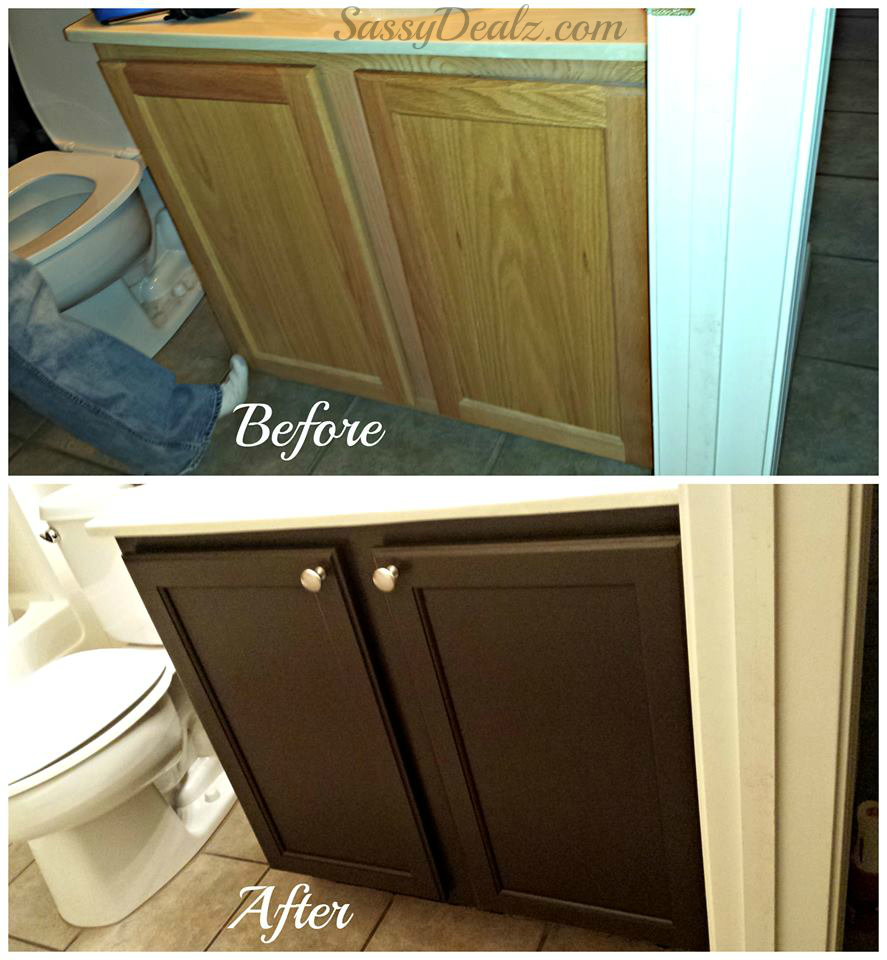
My husband and I wanted to upgrade our bathroom cabinets but didn’t have the money to spend on a whole new vanity! We looked at Home Depot and Lowe’s but couldn’t find the right size either. I guess when they built our house we bought they put in customized sinks. It’s a bummer because we wanted to upgrade the sink to granite but oh well for now!
This post may contain affiliate links. Please read our Disclosure Policy.
ANYWAYS…I stumbled upon a before and after picture of cabinets on Google images and got excited. The product they used was called Rust-oleum Cabinet Transformations. I immediately researched this on Amazon and other websites. It was around $50-70 in most stores for the whole kit which seemed reasonable for us. We chose the color Espresso which is a rich chocolatey-brown color.


We used two brushes to finish the job. The first one was a 2 inch synthetic brush for painting the base coats and the second was a foam brush for picking up excess polyurethane to prevent bubbles/runs.
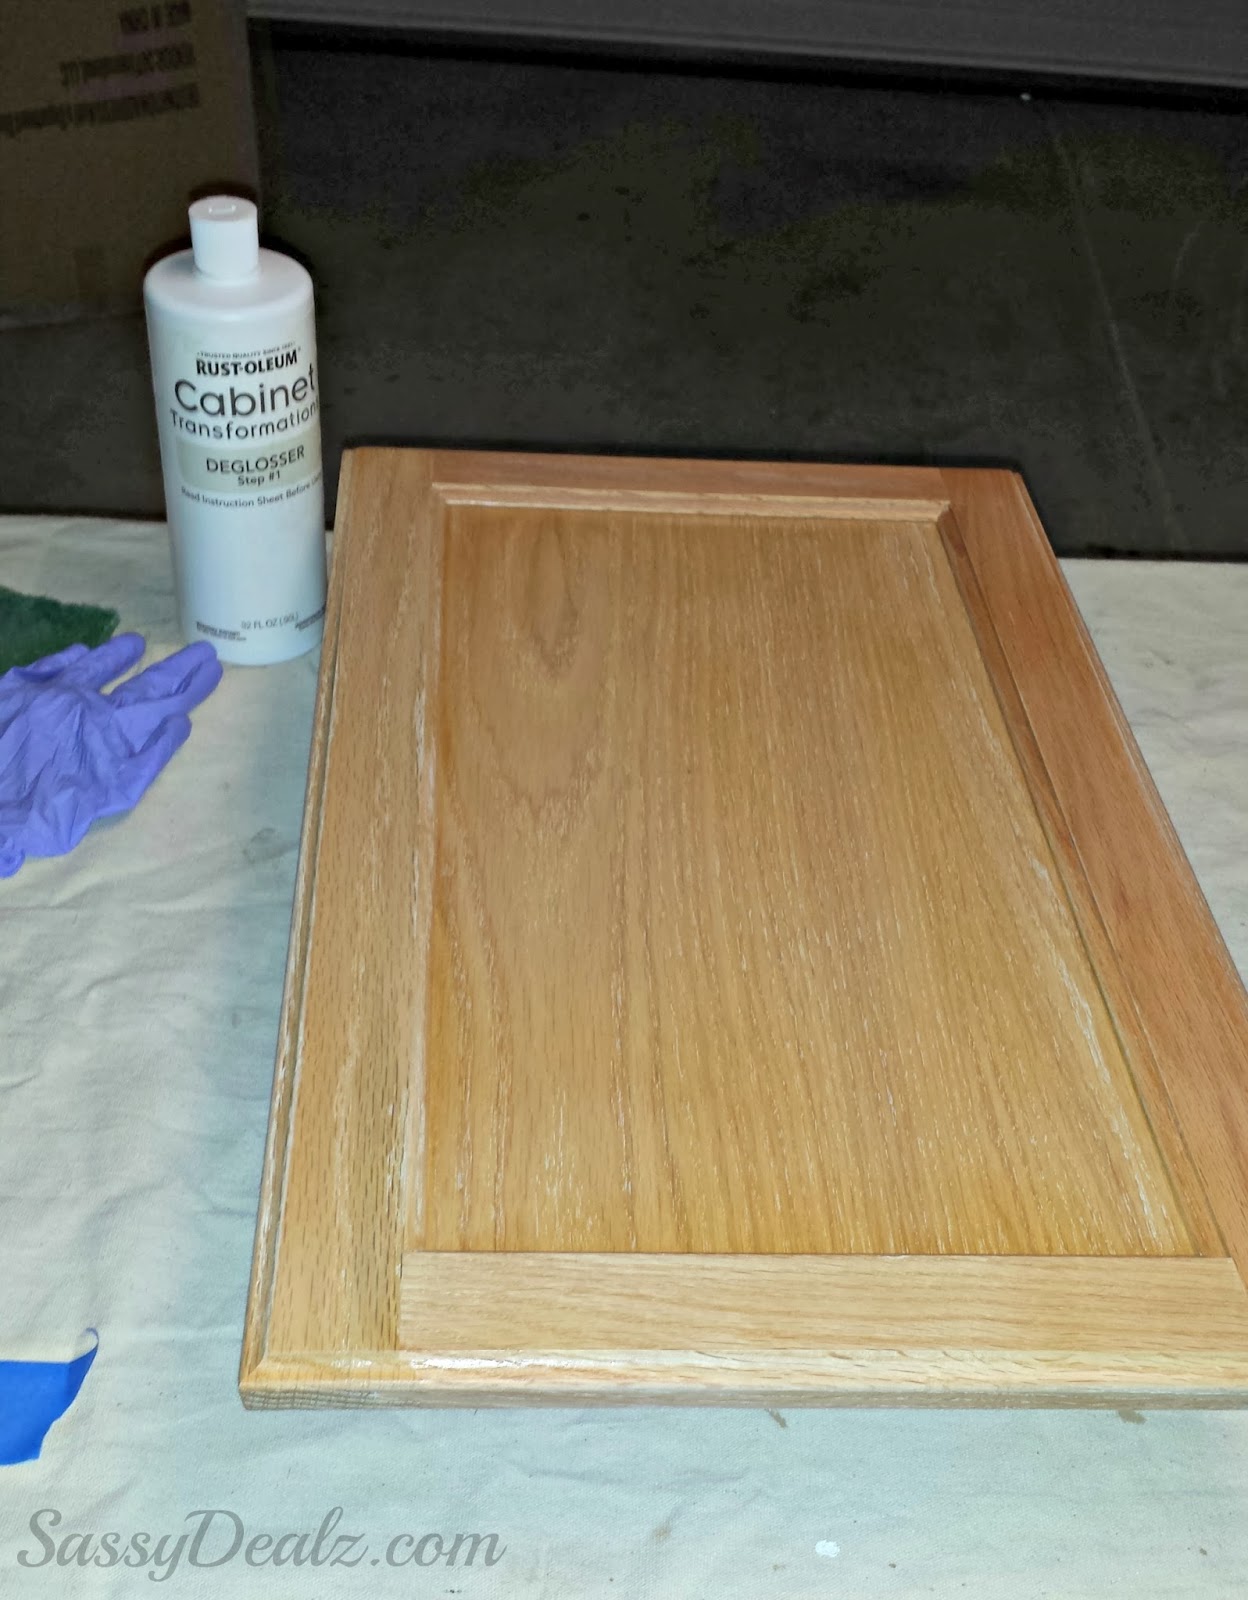
Before you run out and buy this kit, make sure you know that it is a LONG process. There are lots of steps and the hours you spend waiting for them to dry is time consuming. The best part of this transformation kit is that you don’t need to sand anything! Above is a picture of our cabinet door with their Deglosser product on it. It strips all the varnish and shine from the doors so the stain will stick better. The DVD that this kit comes with says to use nails in a wood board to hold up the doors but we just used cans of food from the pantry with pieces of cloth draped over them.
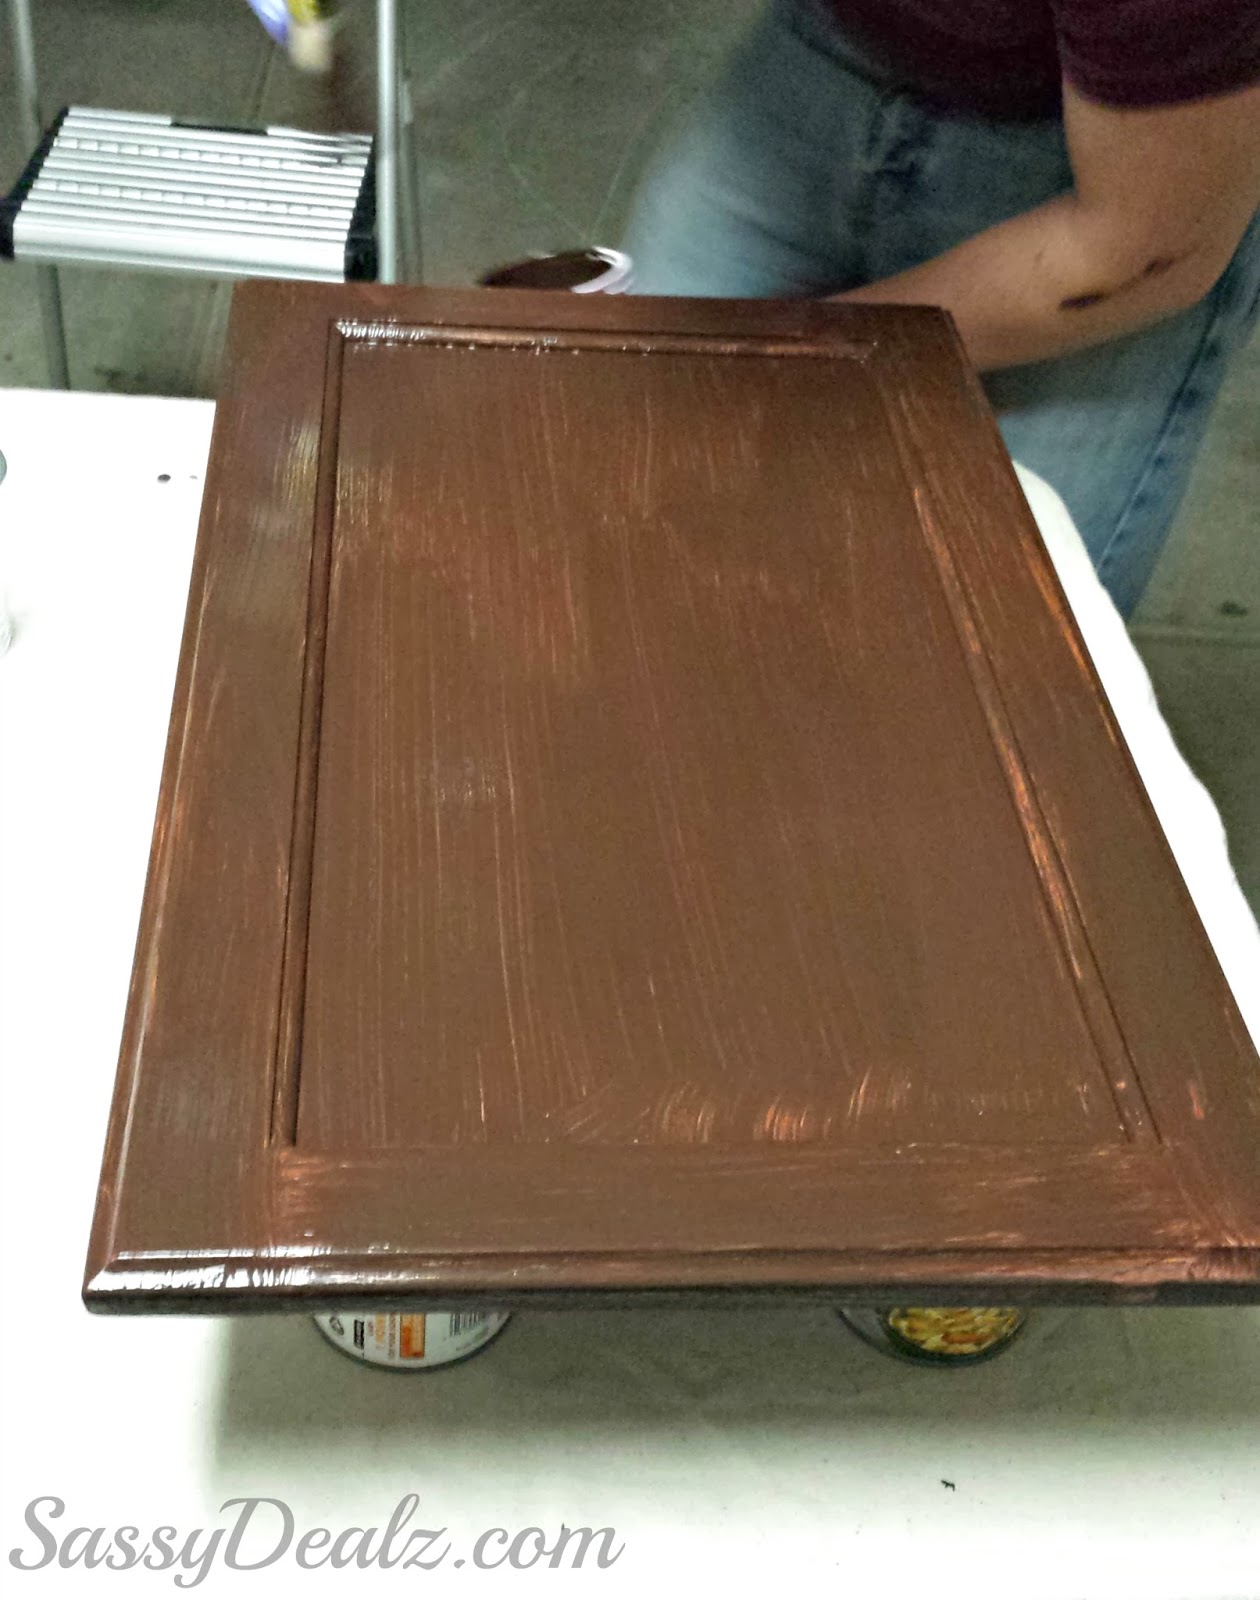
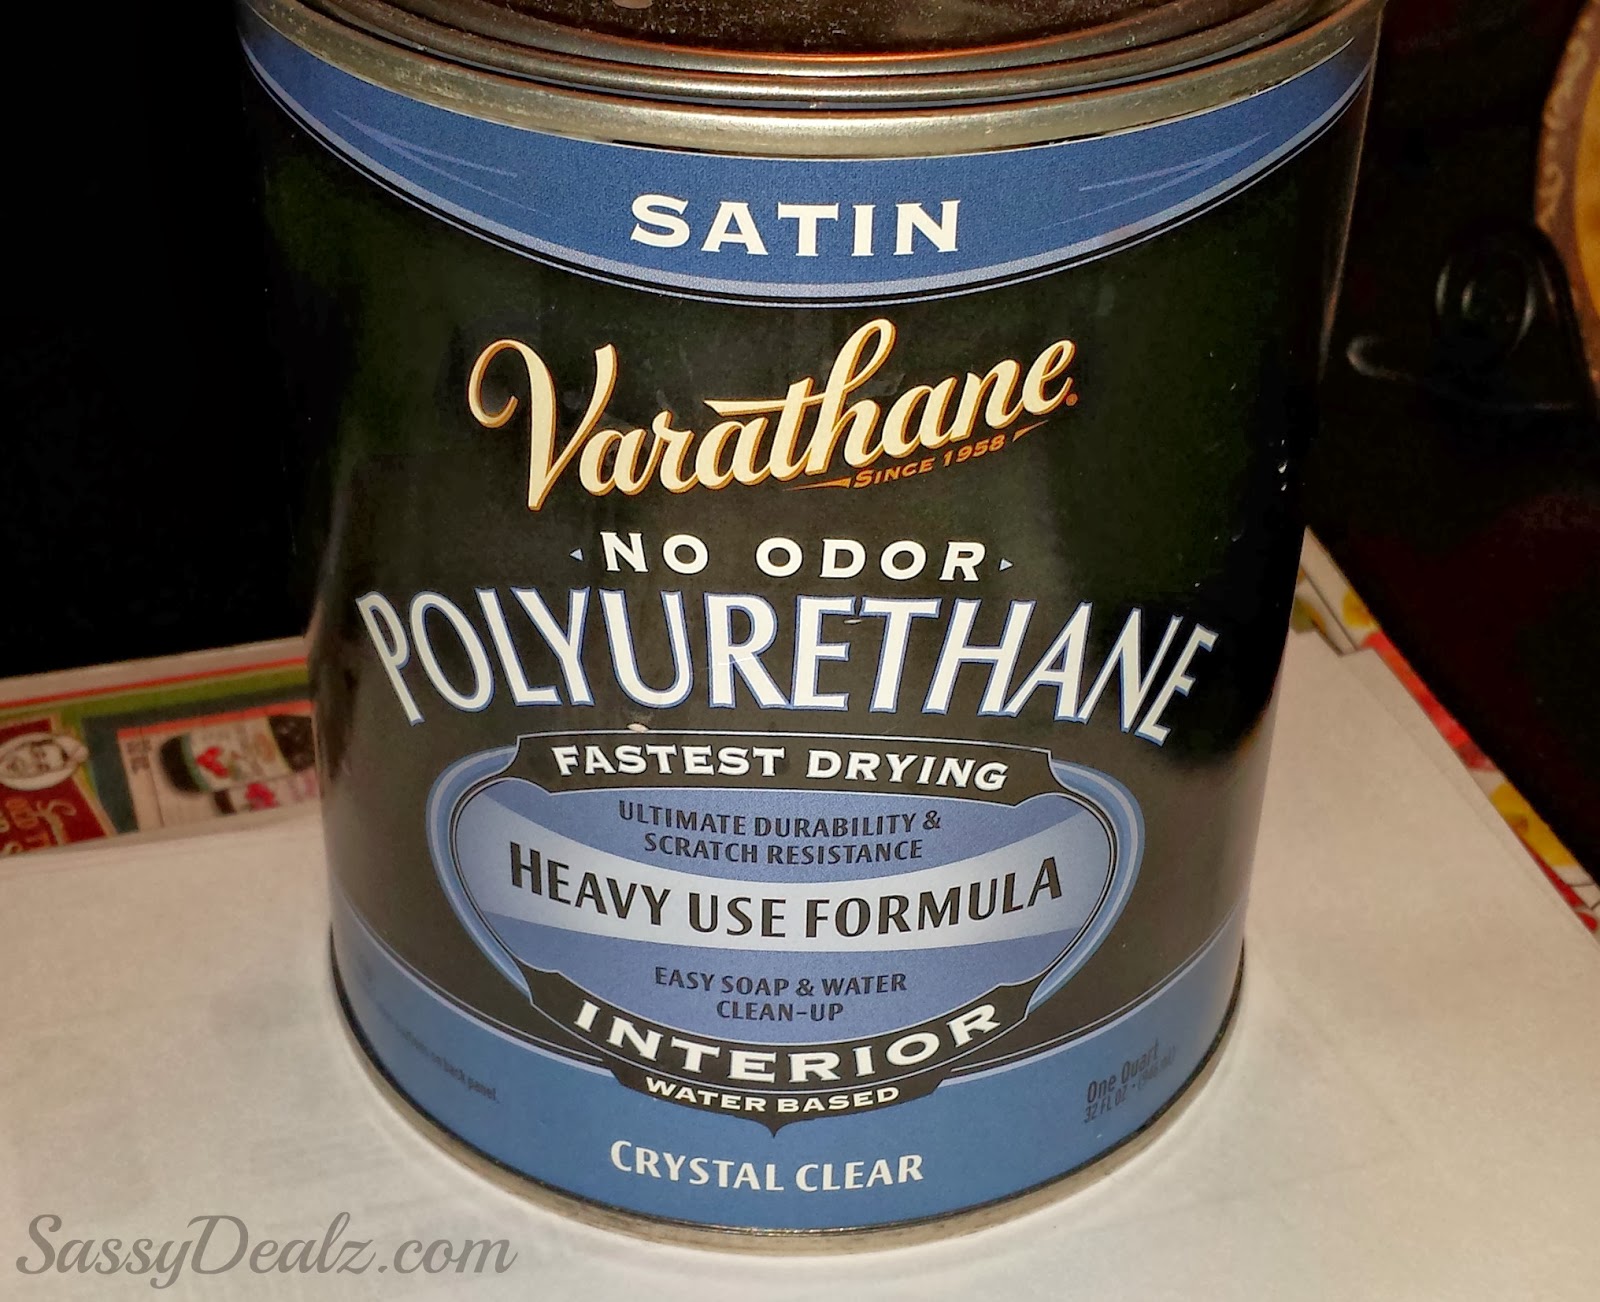
Overall, we are very pleased with this Rustoleum kit BUT you need to know that their varnish it comes with is crap! The last step of the process is to put the shiny coat on and the one it comes with turned our beautiful cabinets white and chunky. We had to sand it down and start from the beginning. Go to Home Depot and grab this Polyurethane – make sure it is a satin finish, Interior, and water-based. Do thin strokes so it doesn’t pool on the doors, especially in the corners.
As you can see on our first before and after picture, the cabinets look 100x better. I like the modern feel it gives and we also bought chrome knobs to finish the look. We did our small bathroom vanity and had about 1 1/2 cans of the base coat left so we are going to do our master bathroom as well. Hopefully we get to the kitchen too! This definitely is a learning process so I would recommend doing a small project before you jump right into a whole kitchen, for example. Let me know what you think or if you’ve used this kit before! :)


I think it’s too late unfortunately :(
I am currently doing this same project, however I unfortunately just used the top coat it came with today. I already noticed a few white chunks and it doesn’t go on very even. Can I go over it again with a different polyurethane like you recommended or do you think it is it too late?
Thanks! We used the color Espresso.
What color did you use? It looks fantastic.
We also redid a bathroom vanity, but we didn’t use this product. I don’t know if they had it when we did ours 7 years ago! I do love the color though! Thank you for joining us for the Thumping Thursday bloghop.